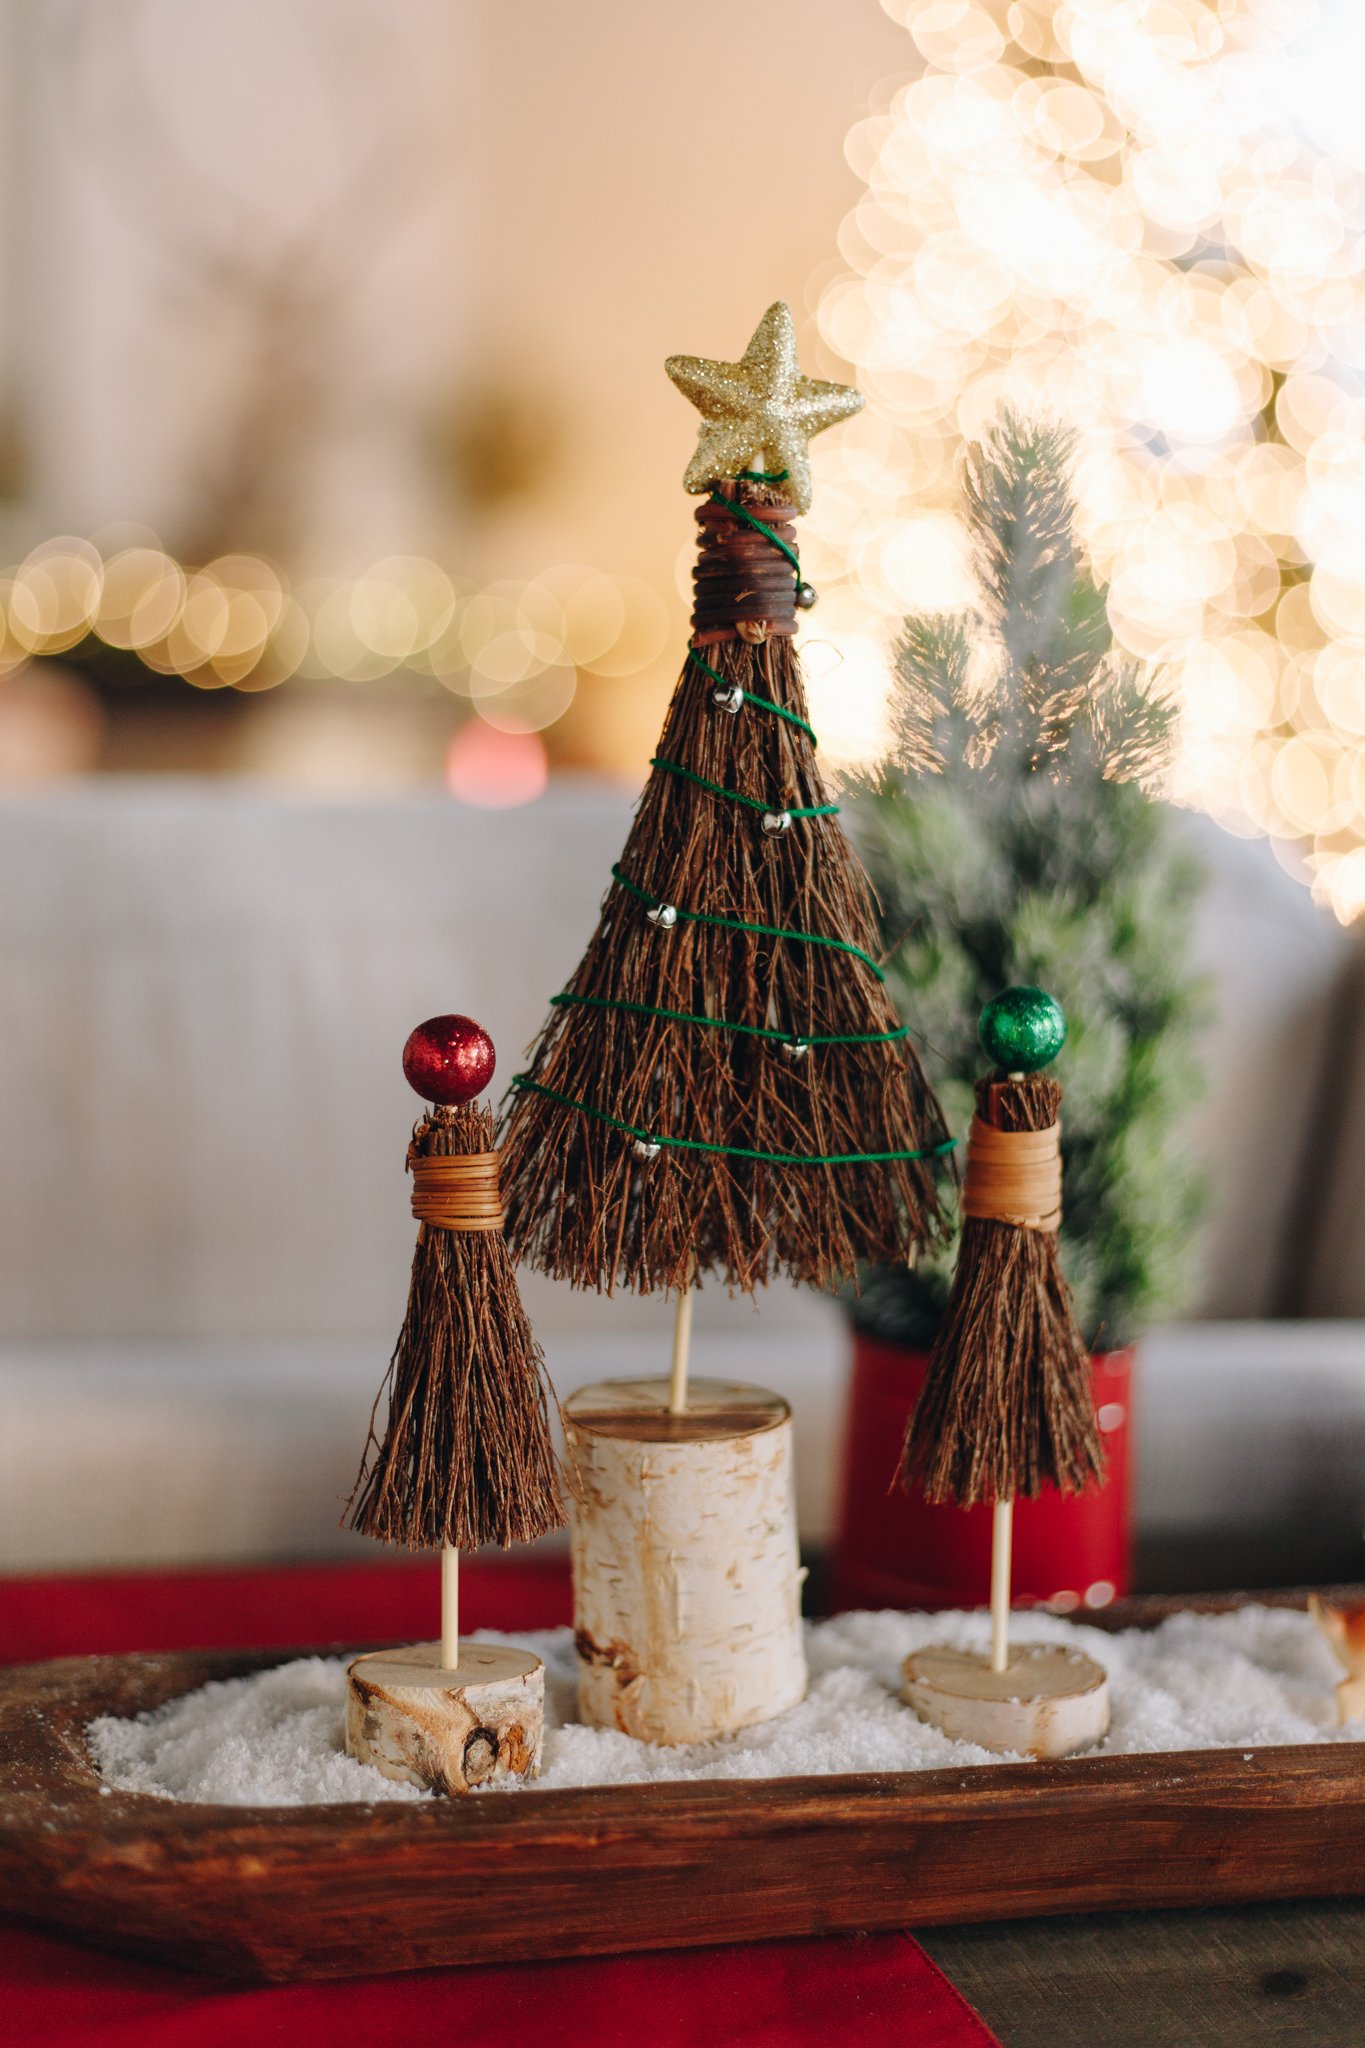
Craft a Scenic, Scented Forest To Beautify Your Natural Holiday Table Decor
This holiday season, forget the traditional bottle brush trees and opt for something more unique and enchanting! With this DIY scented broom forest, you'll not only bring the beauty of the forest into your home but also the unforgettable smell. Using mini-scented brooms as your base, this project is easy, fun, and sure to wow your guests.

What You'll Need:
Bindle & Brass Birch Log Bundle (sold in select The Home Depot stores)
Bindle & Brass 3” Scented Brooms & 6" Scented Brooms
Scissors
Wire cutters
Mini bells
Embroidery floss
Saw
Small foam star
Drill
Miniature houses or woodland creatures
Artificial snow (optional)
Step One: Prep Your Materials
Start by painting your skewers in various shades of green and brown. Then, let them dry completely before moving on to the next step. While the paint is drying, you can also prep your artificial snow if you're using it. We decided to keep our skewers neutral to have a more woodsy and natural look, but feel free to get as creative as you'd like!

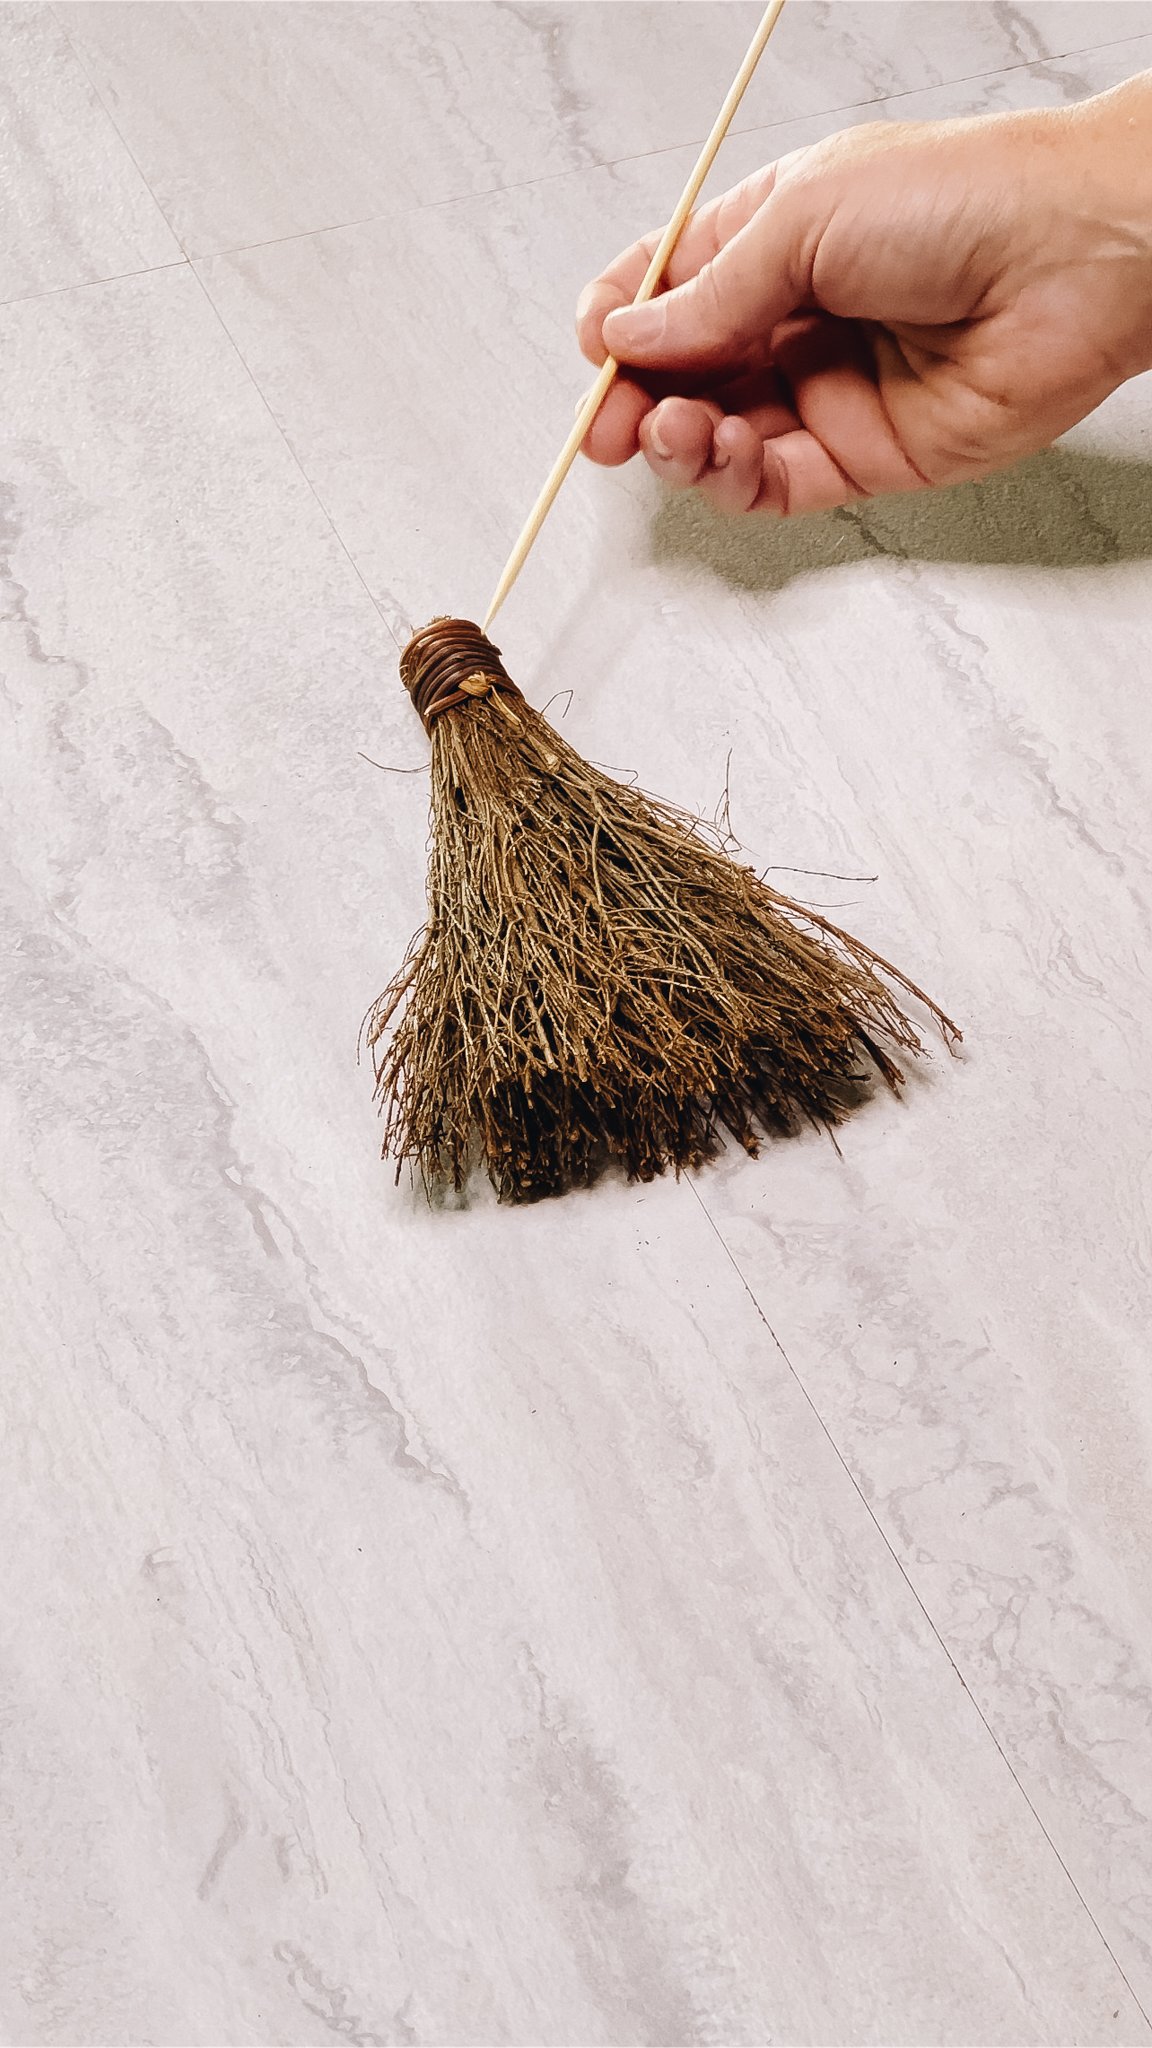
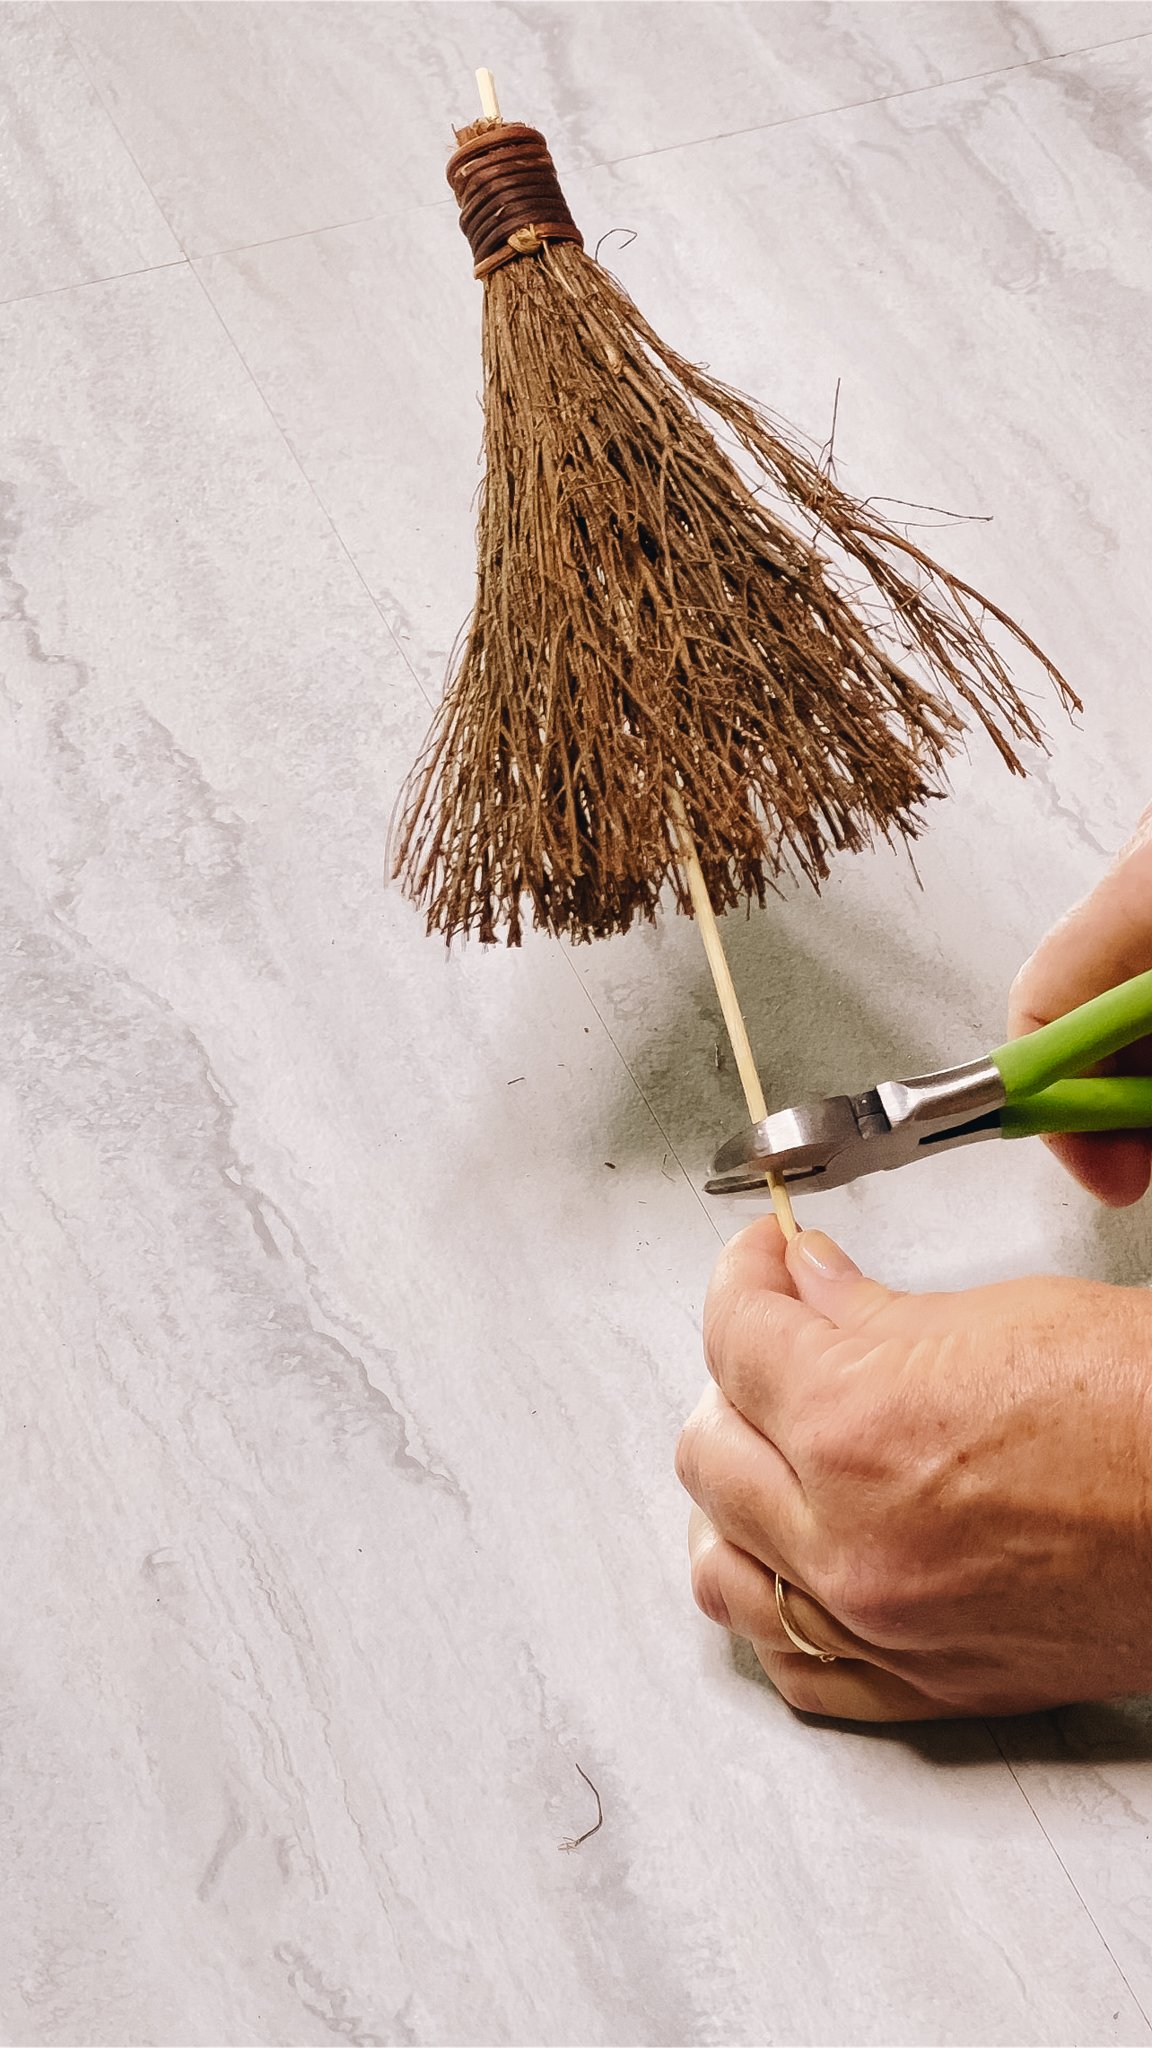
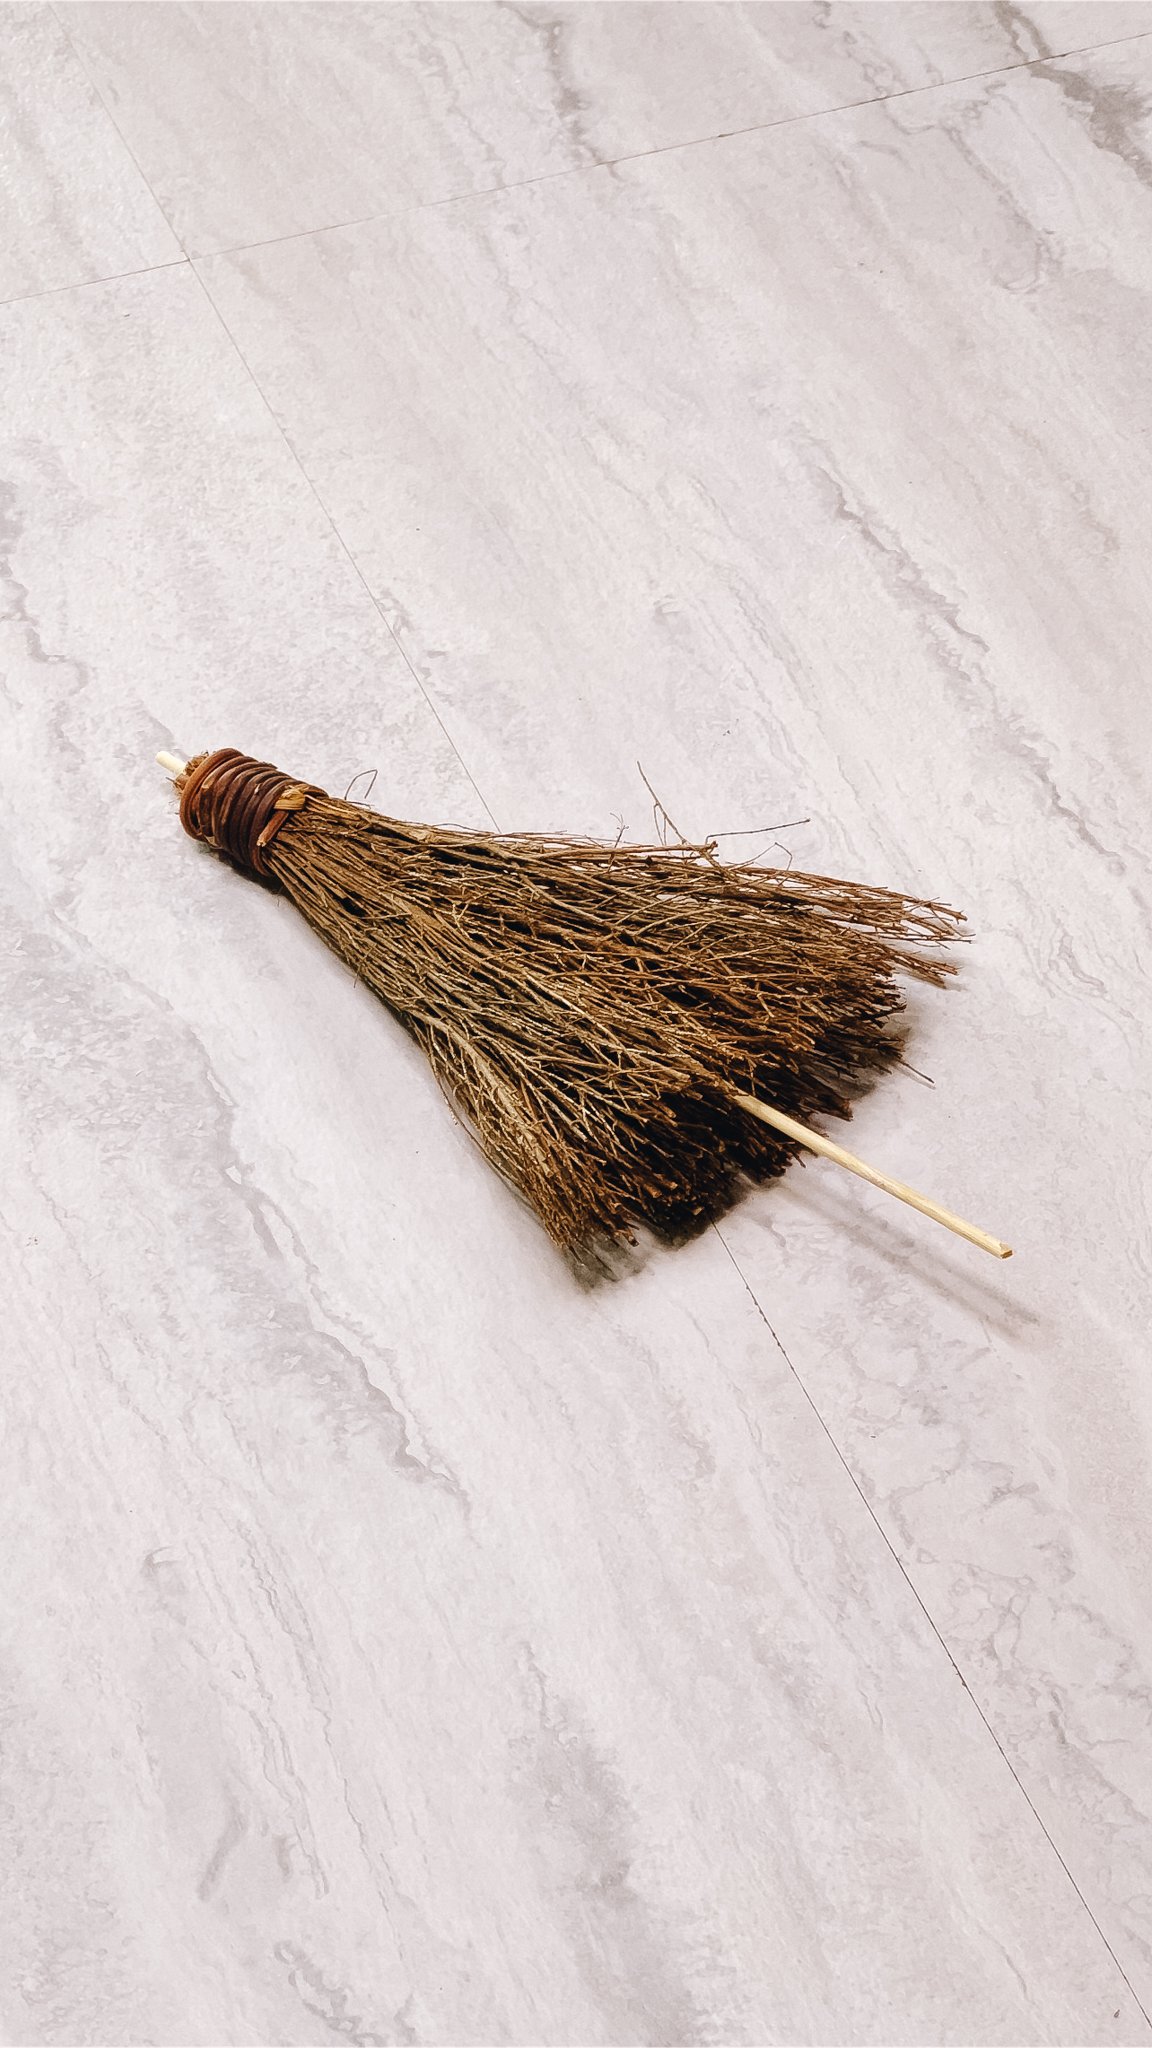


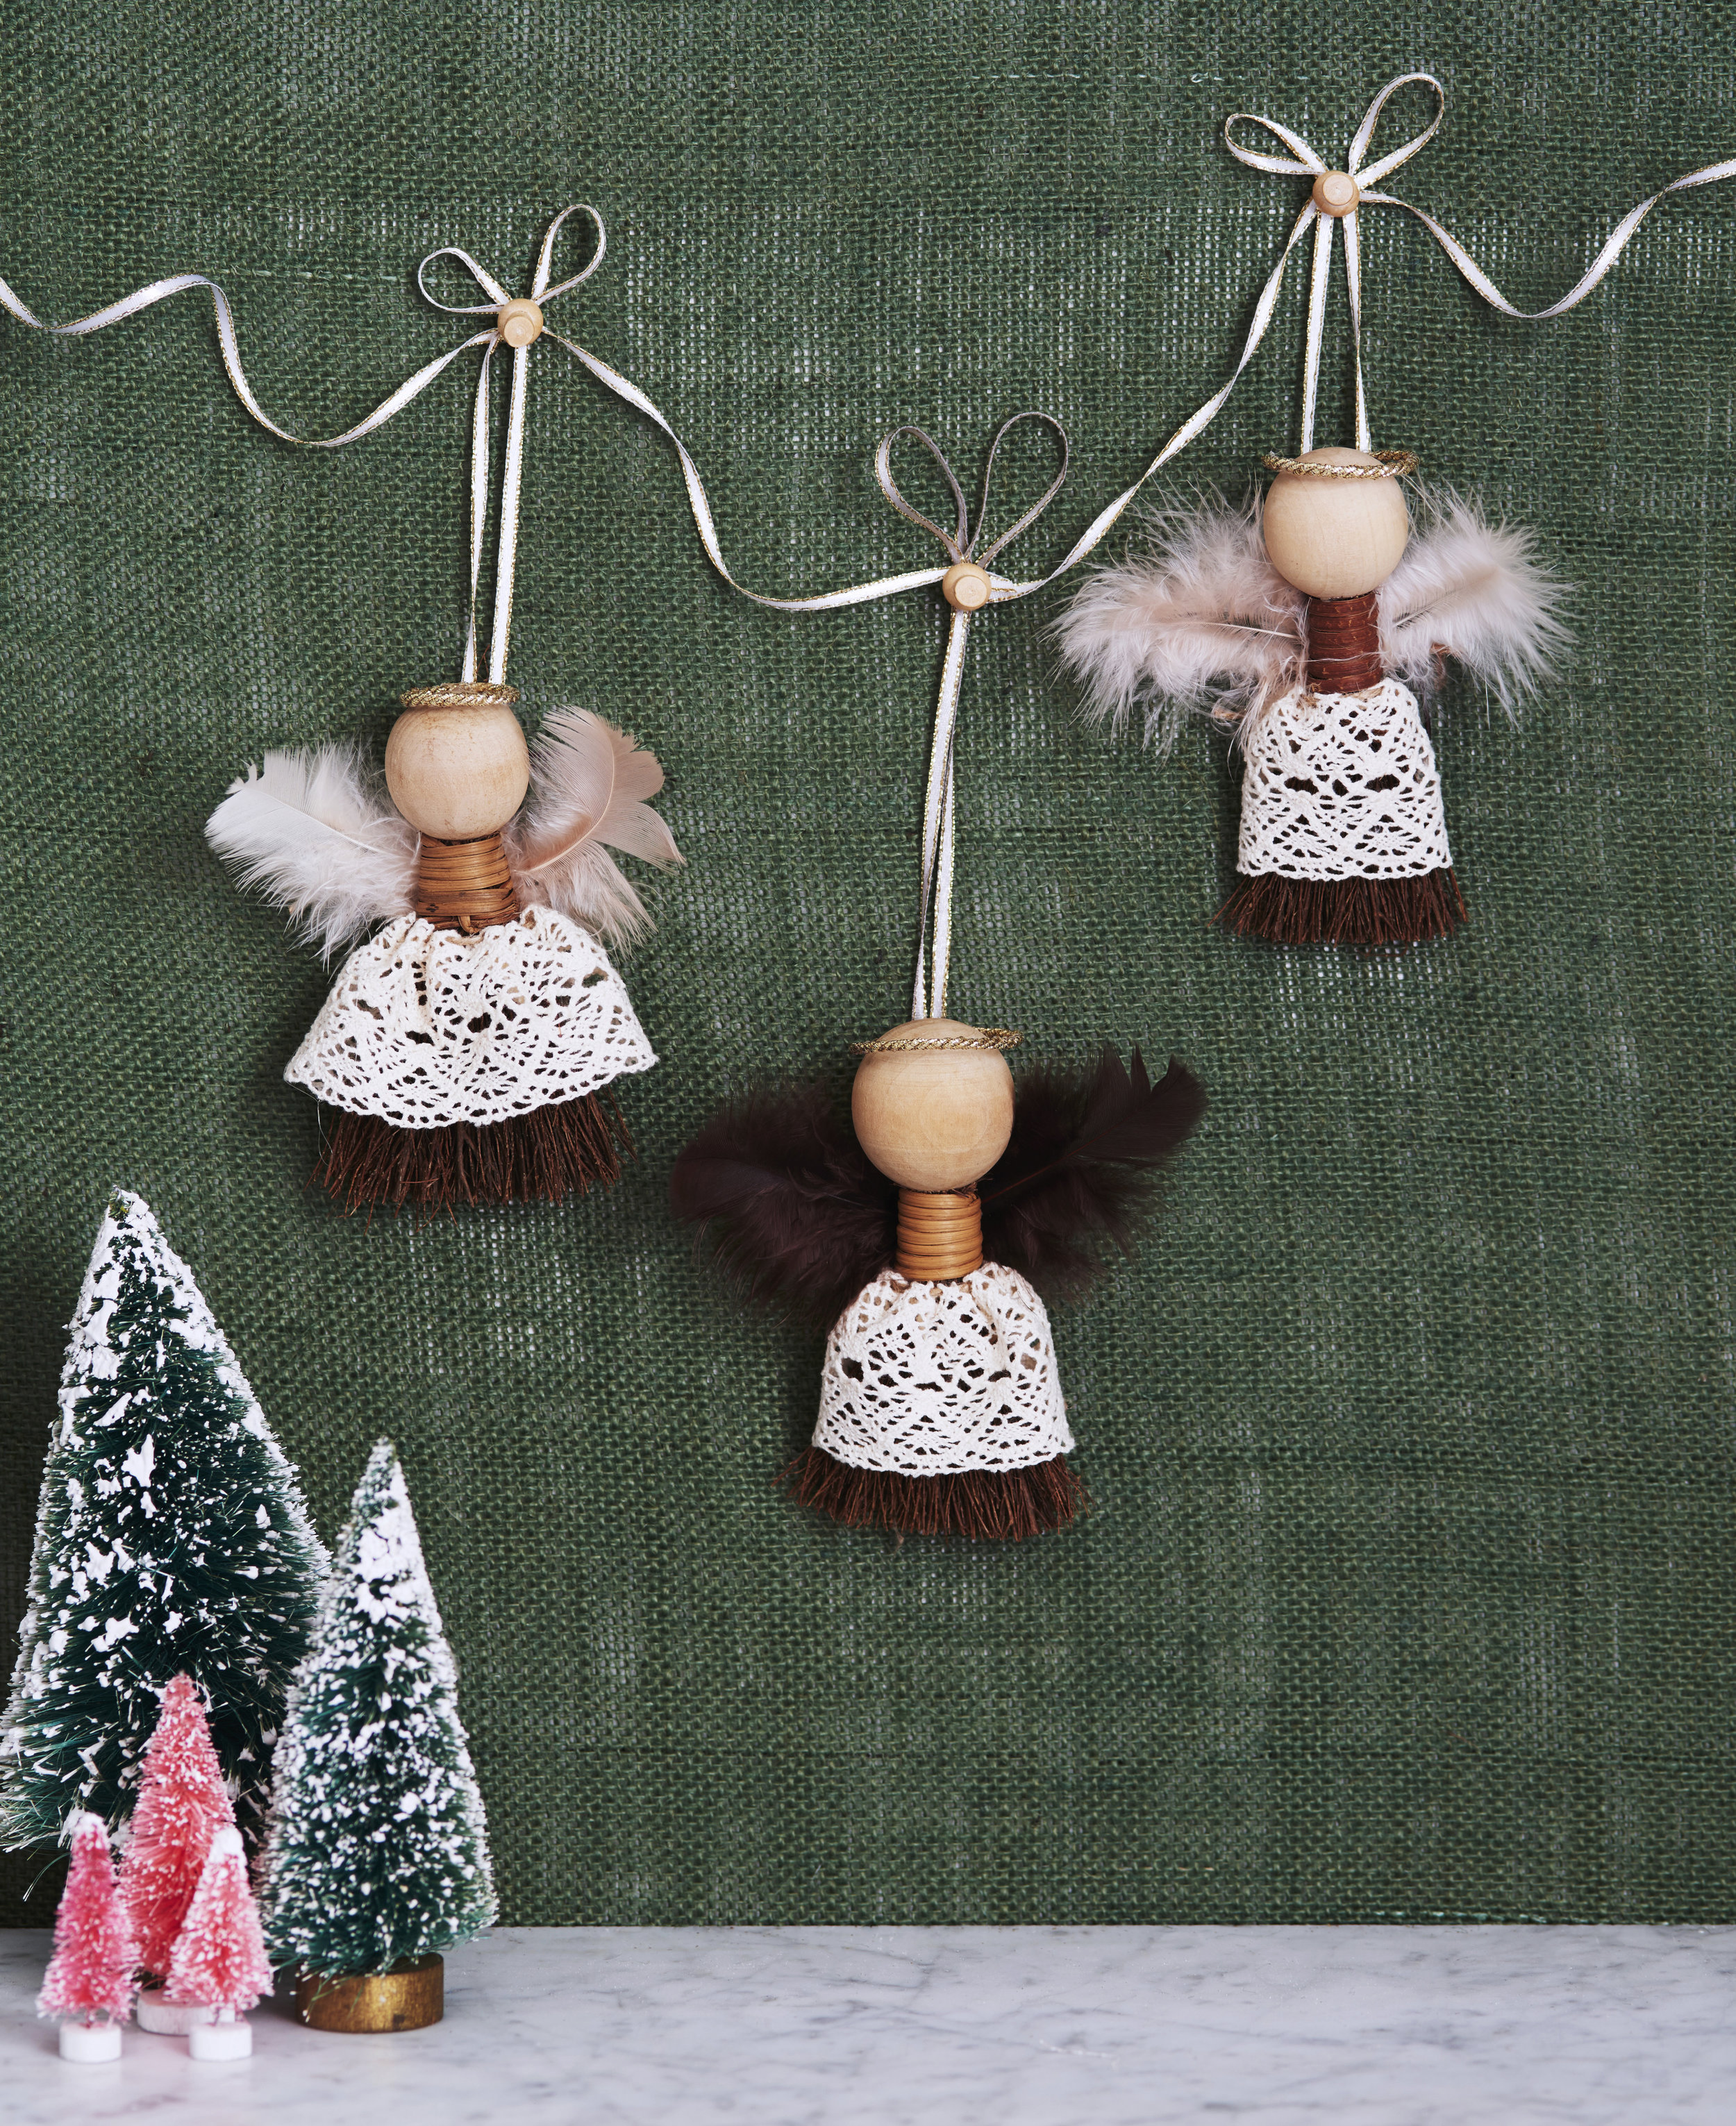
Step Two: Make the Tree Toppers
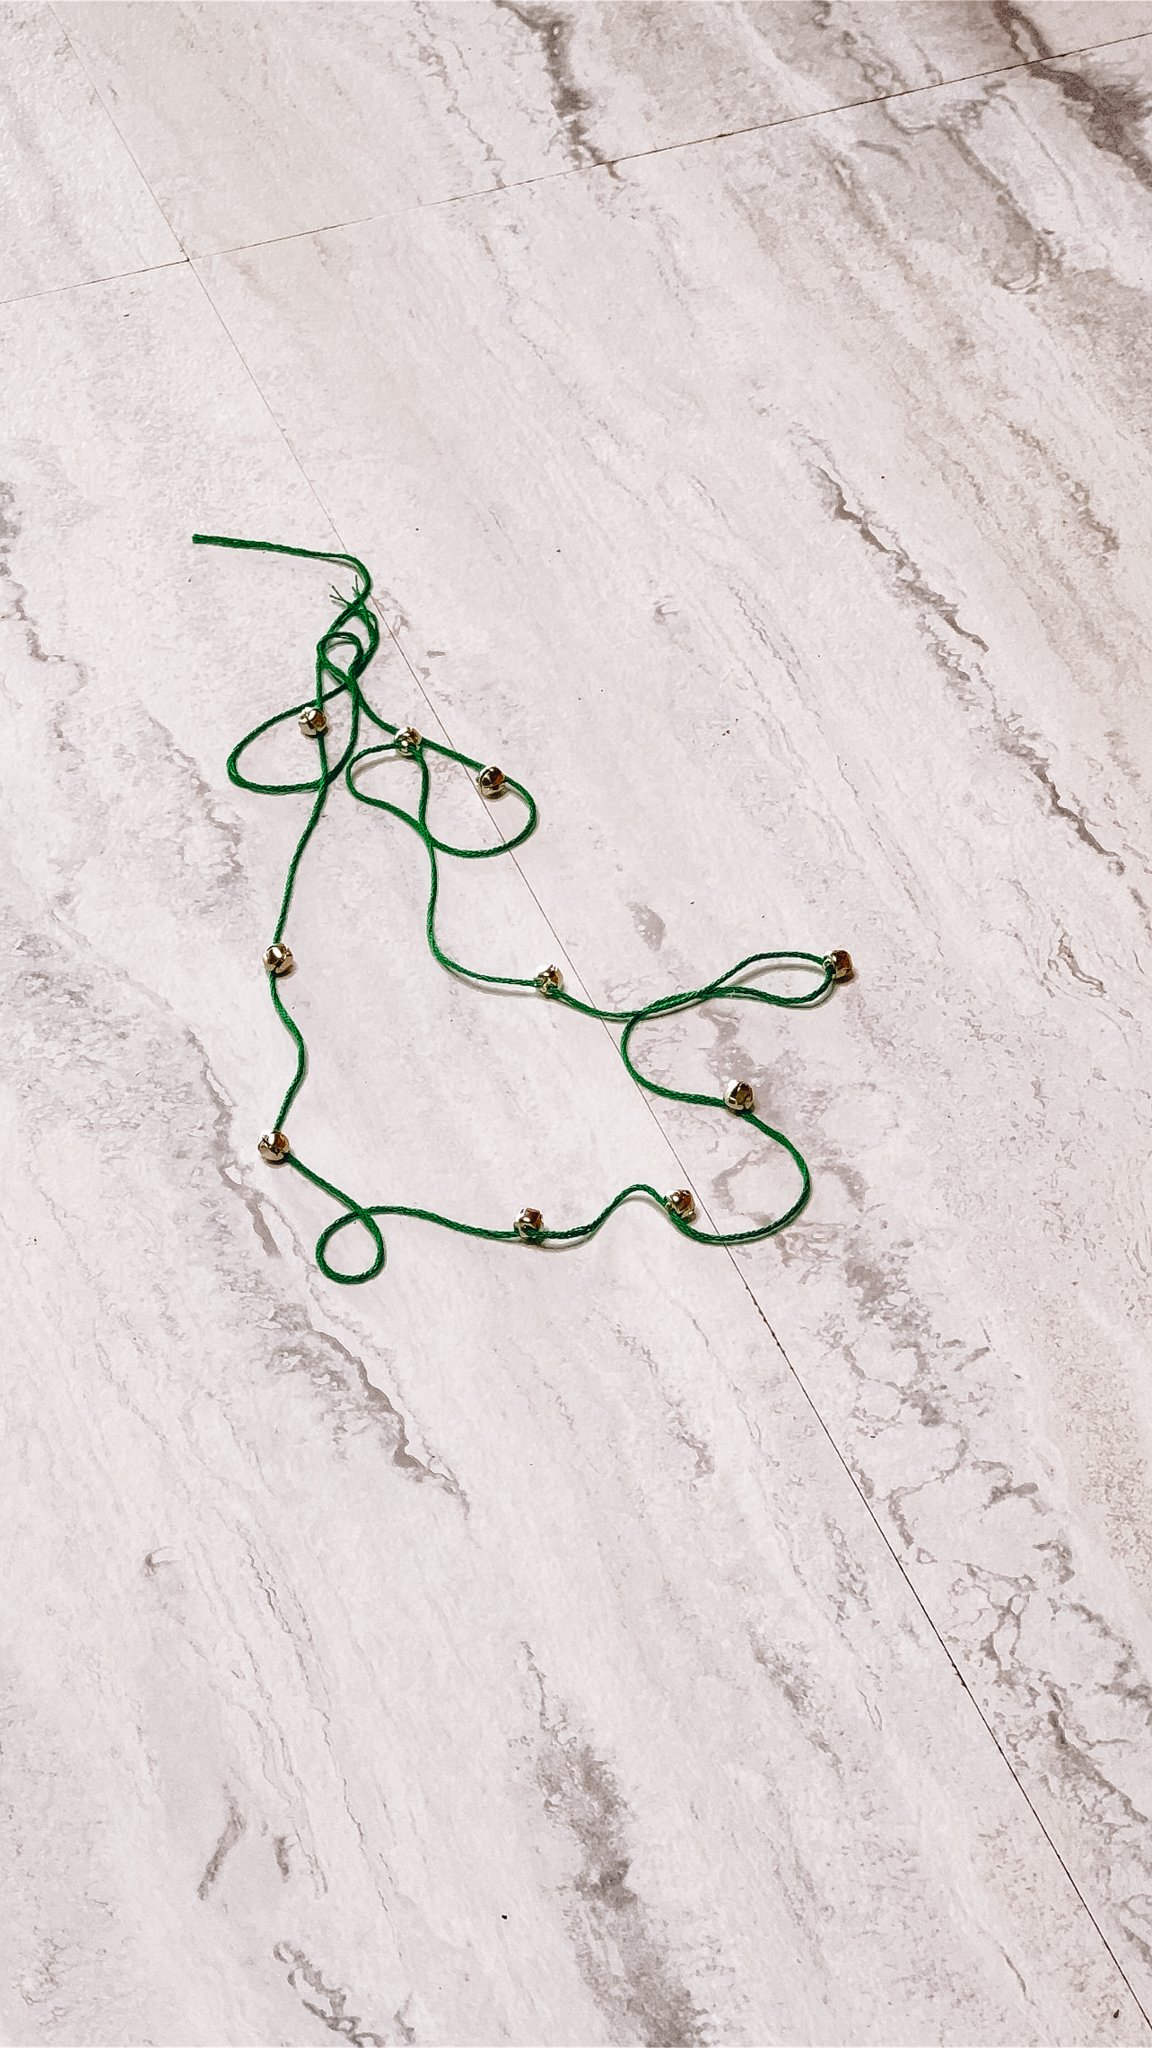
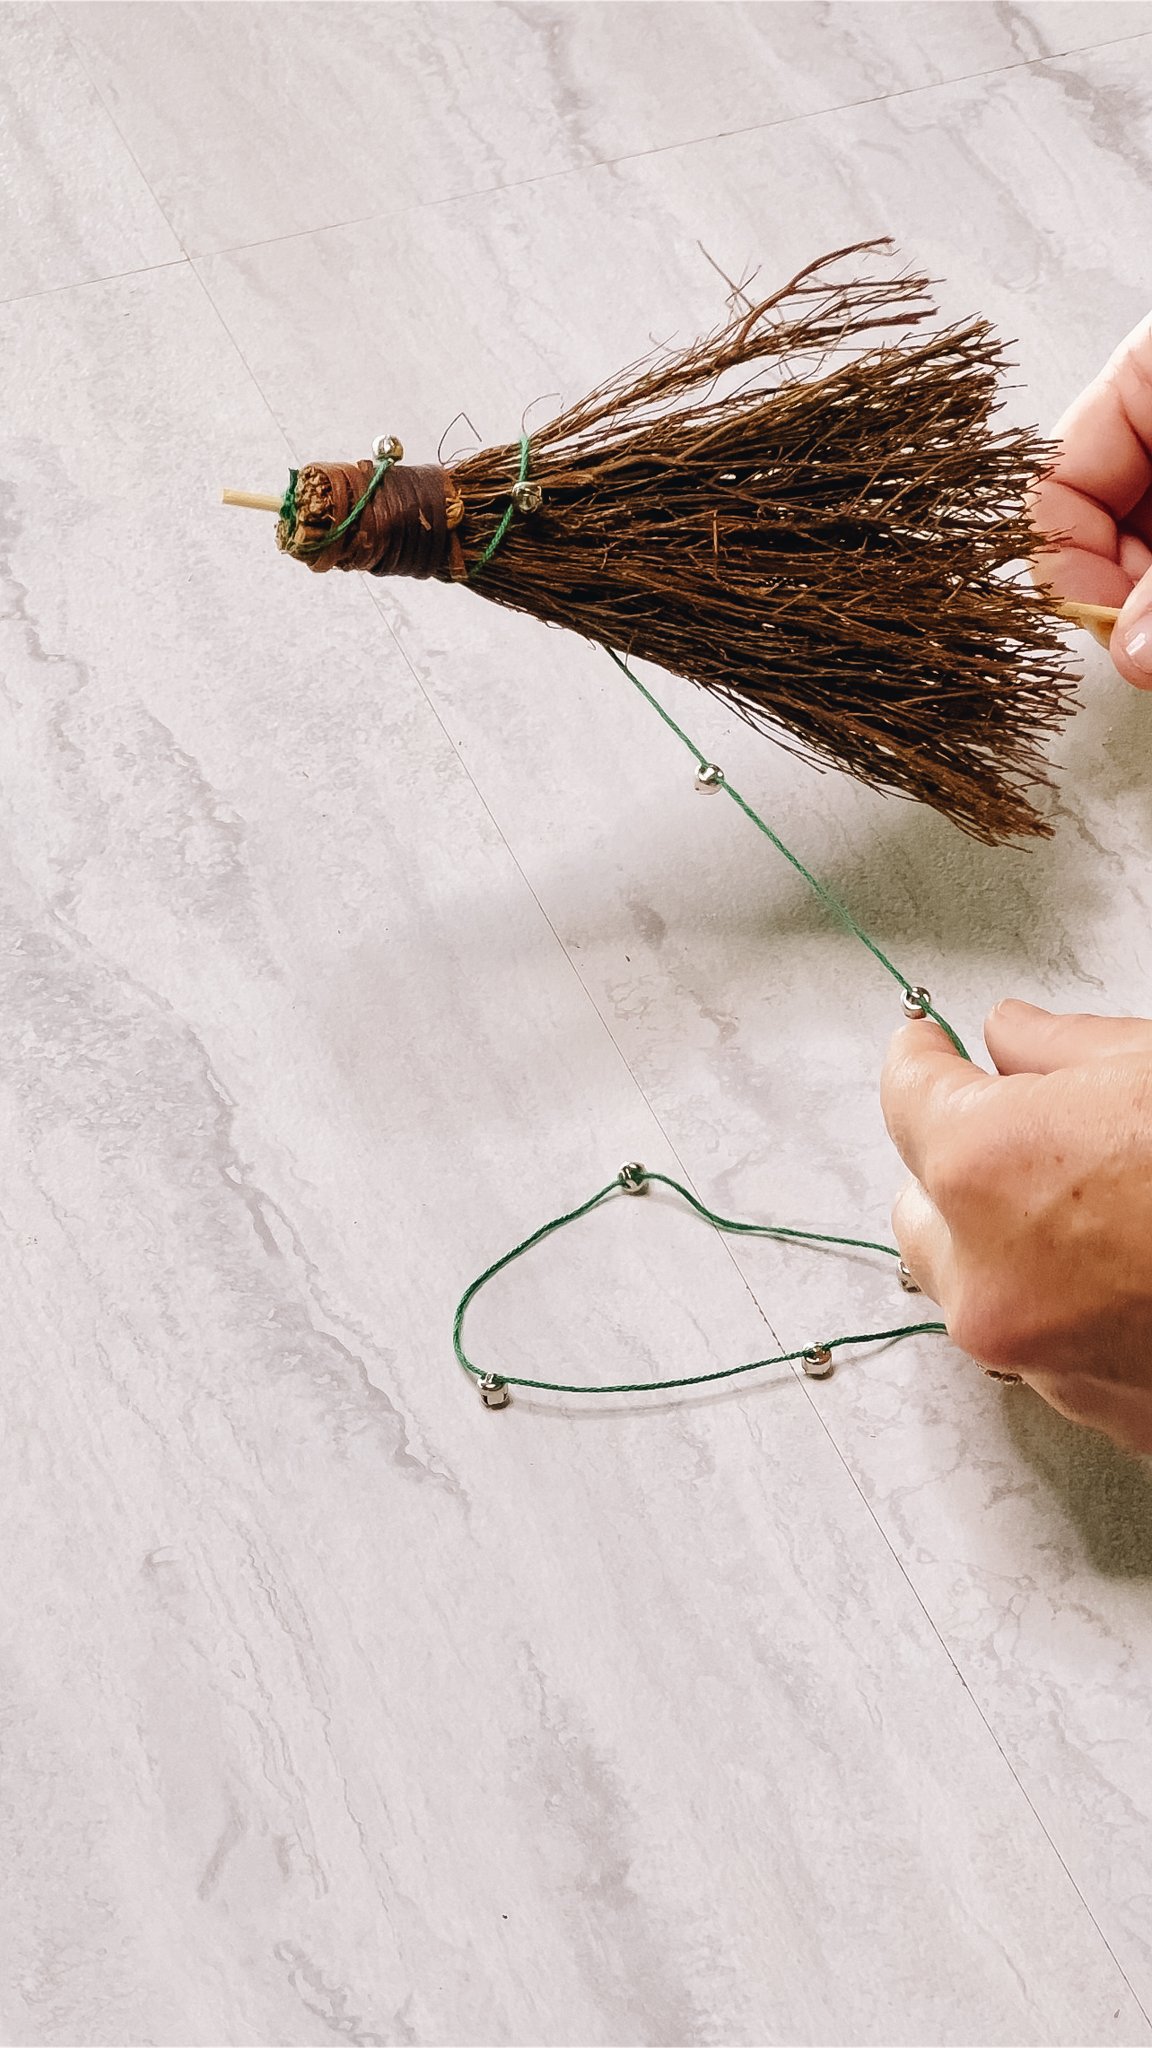
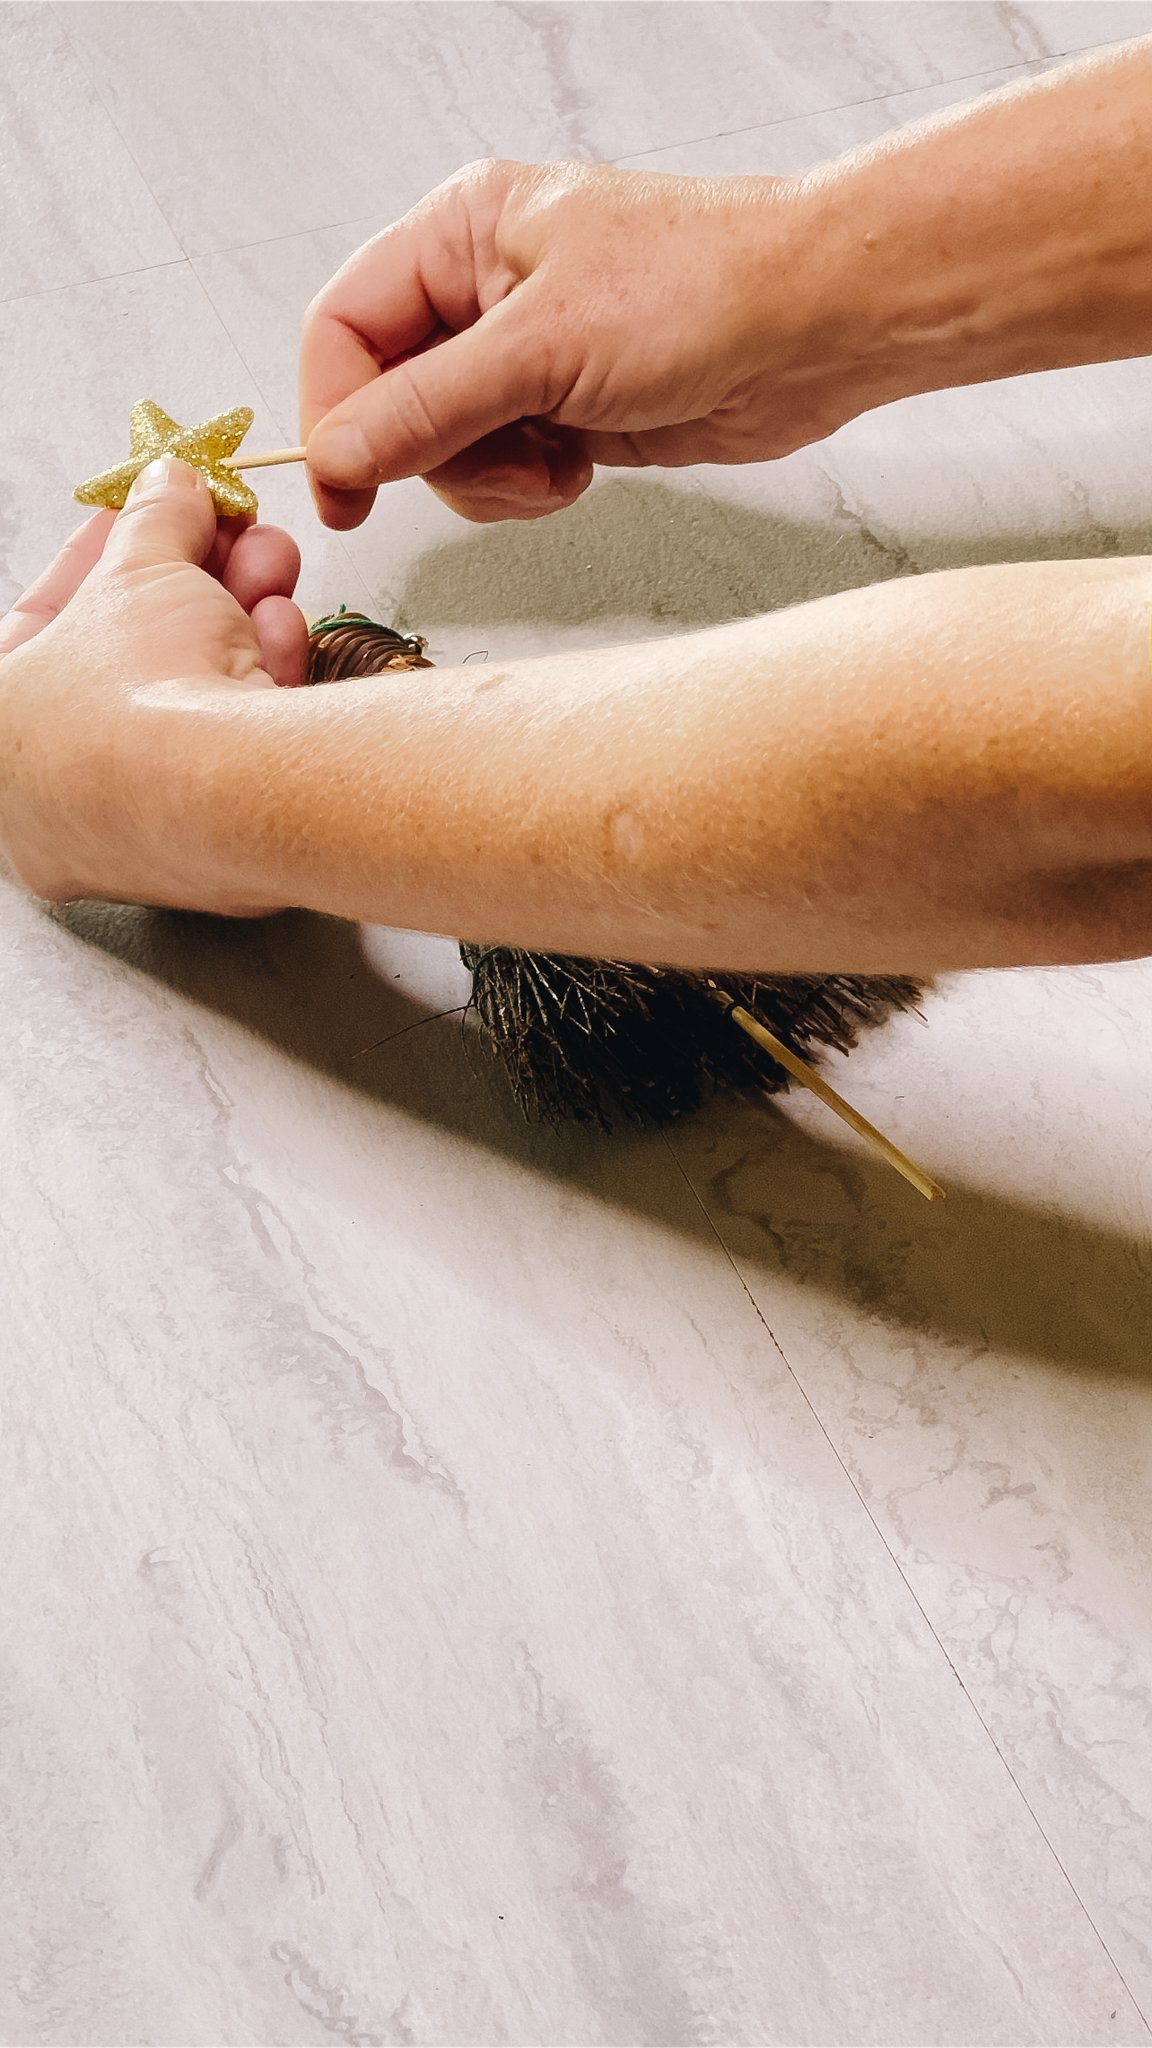
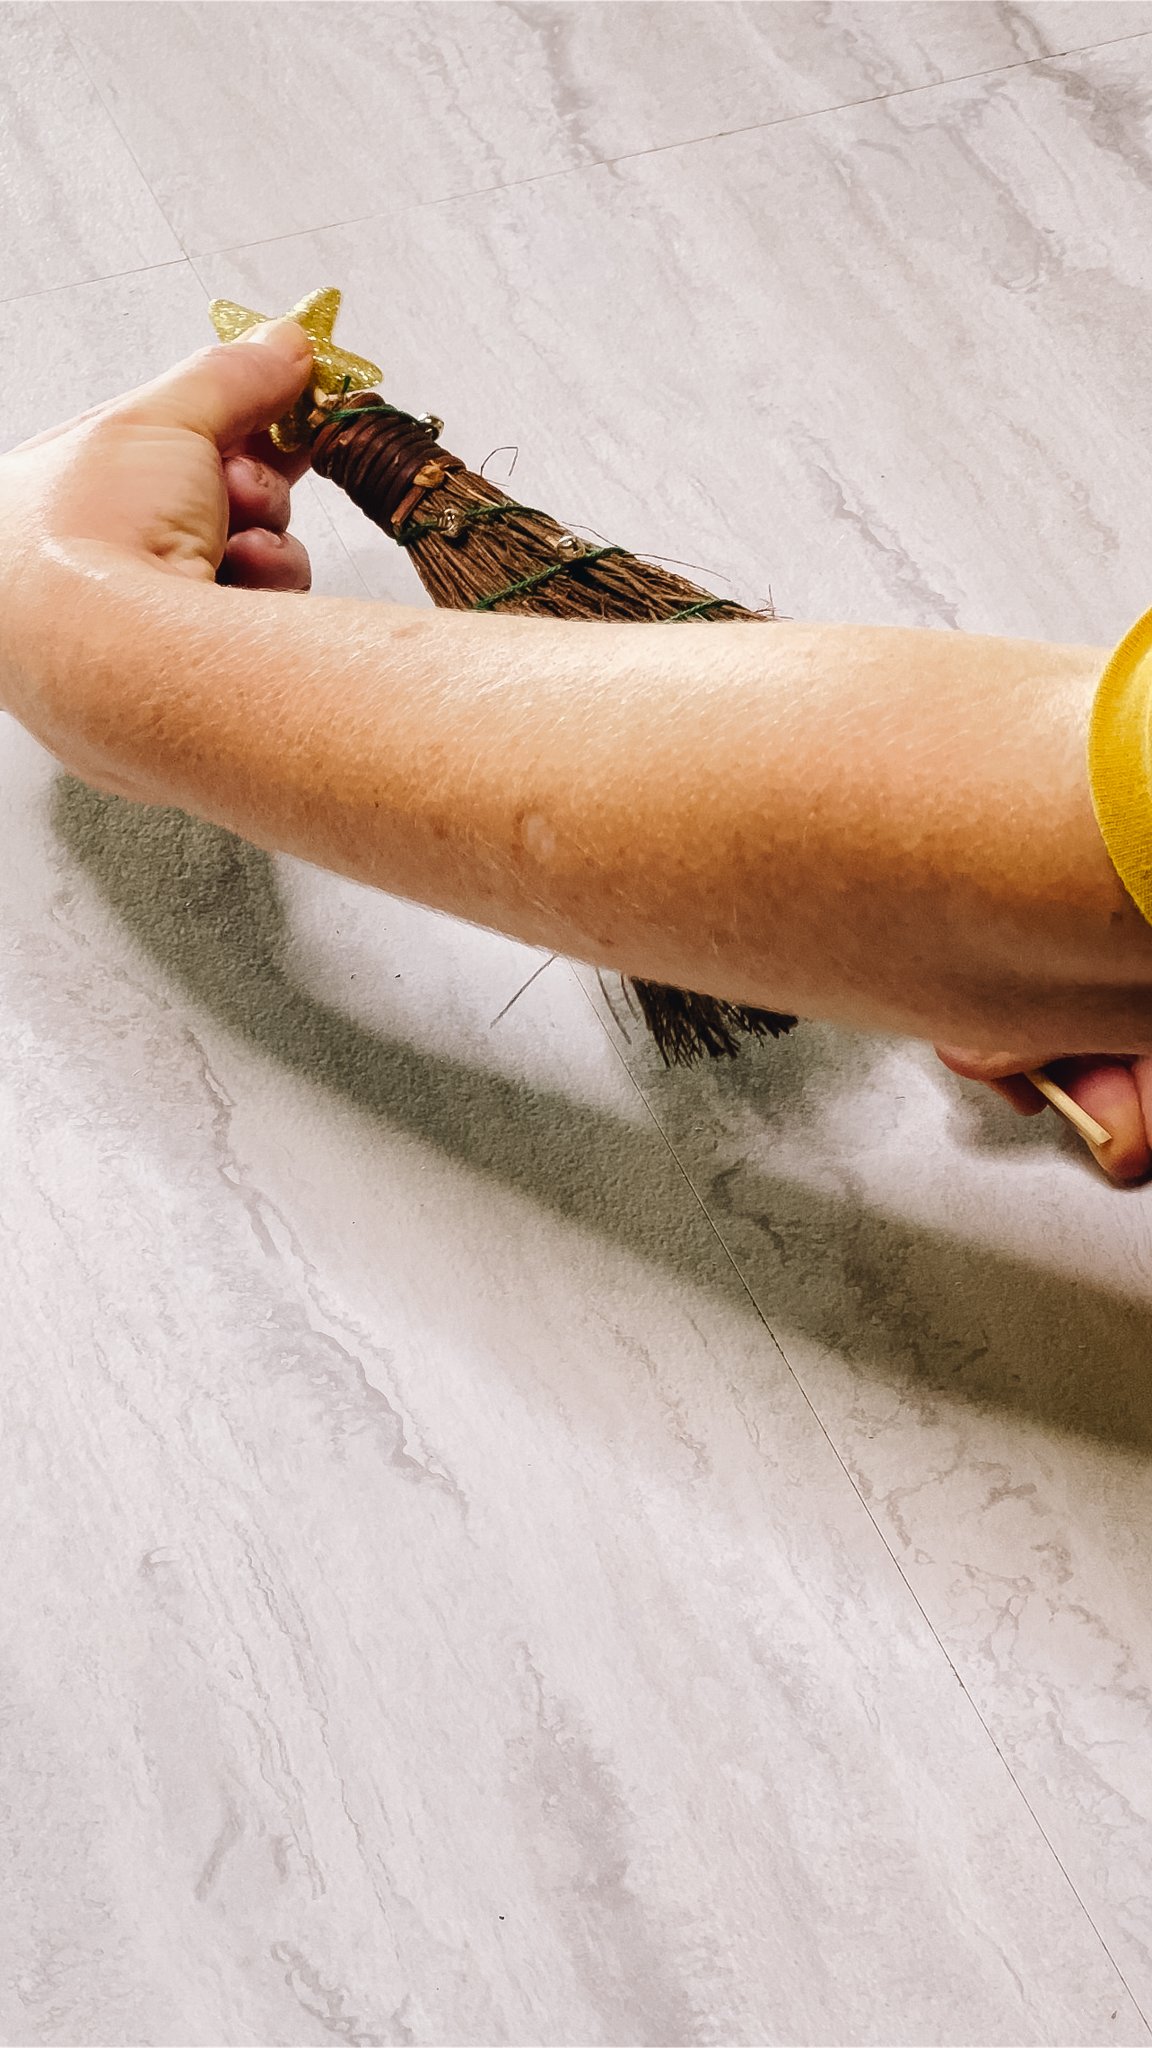
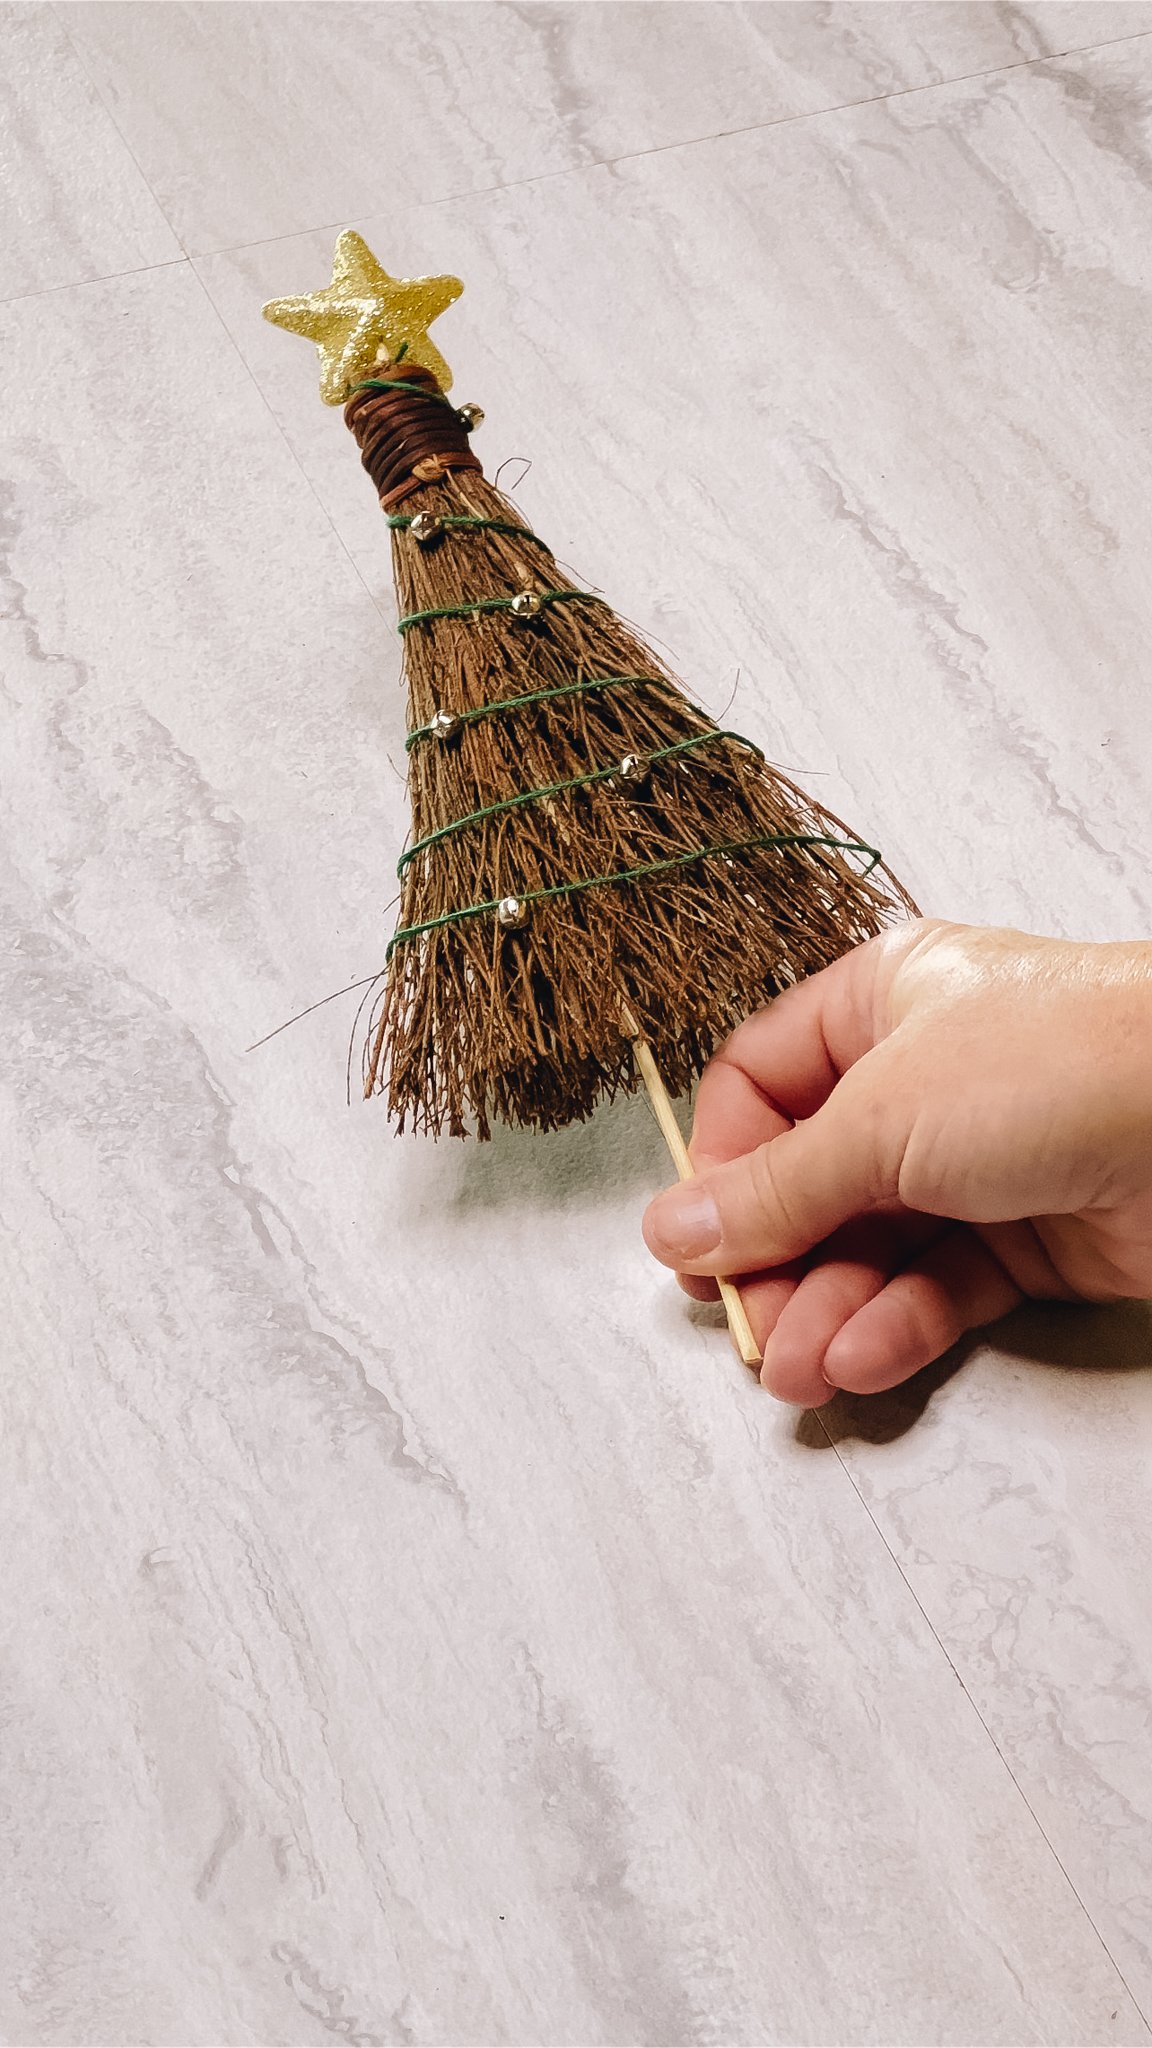
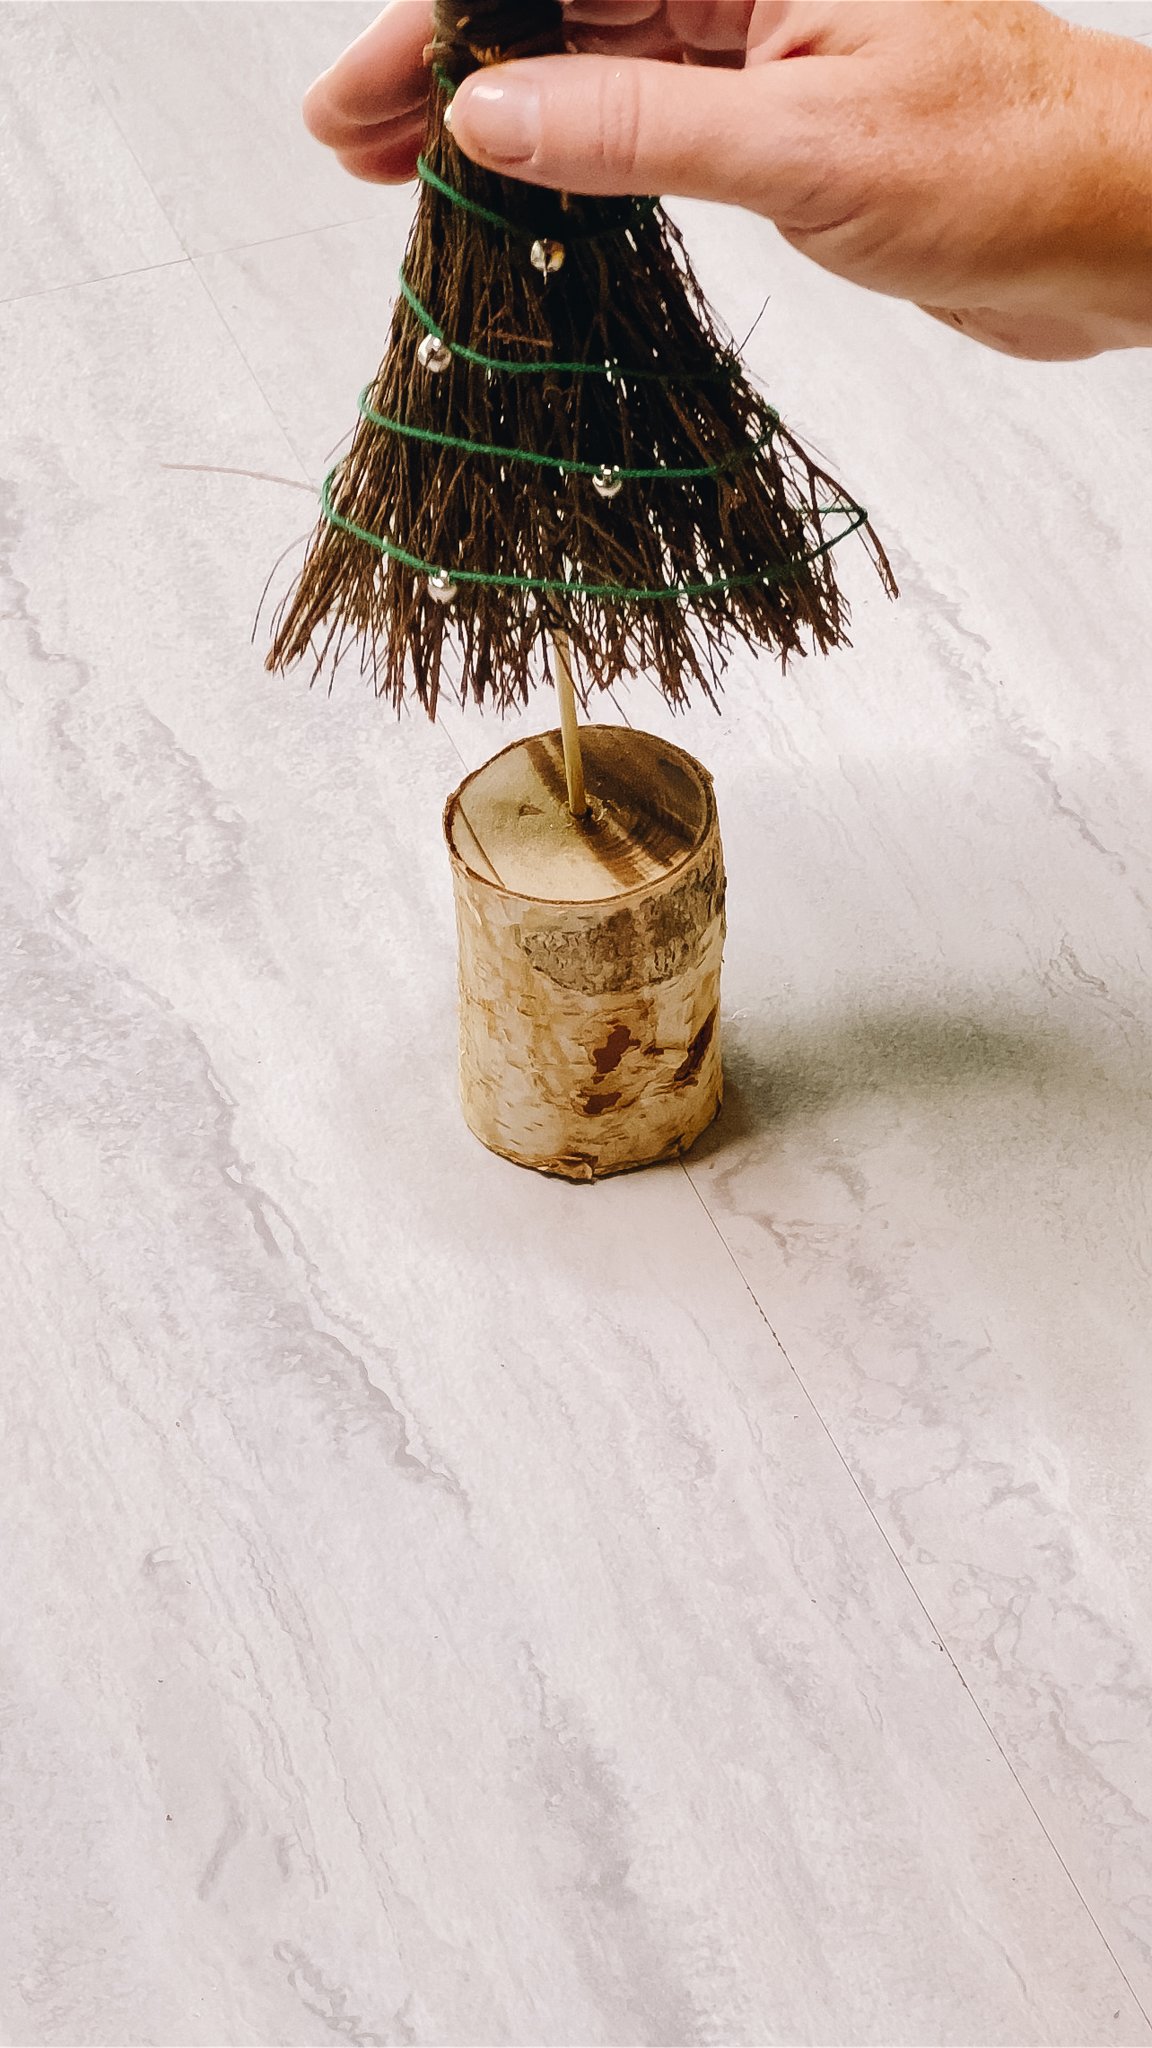
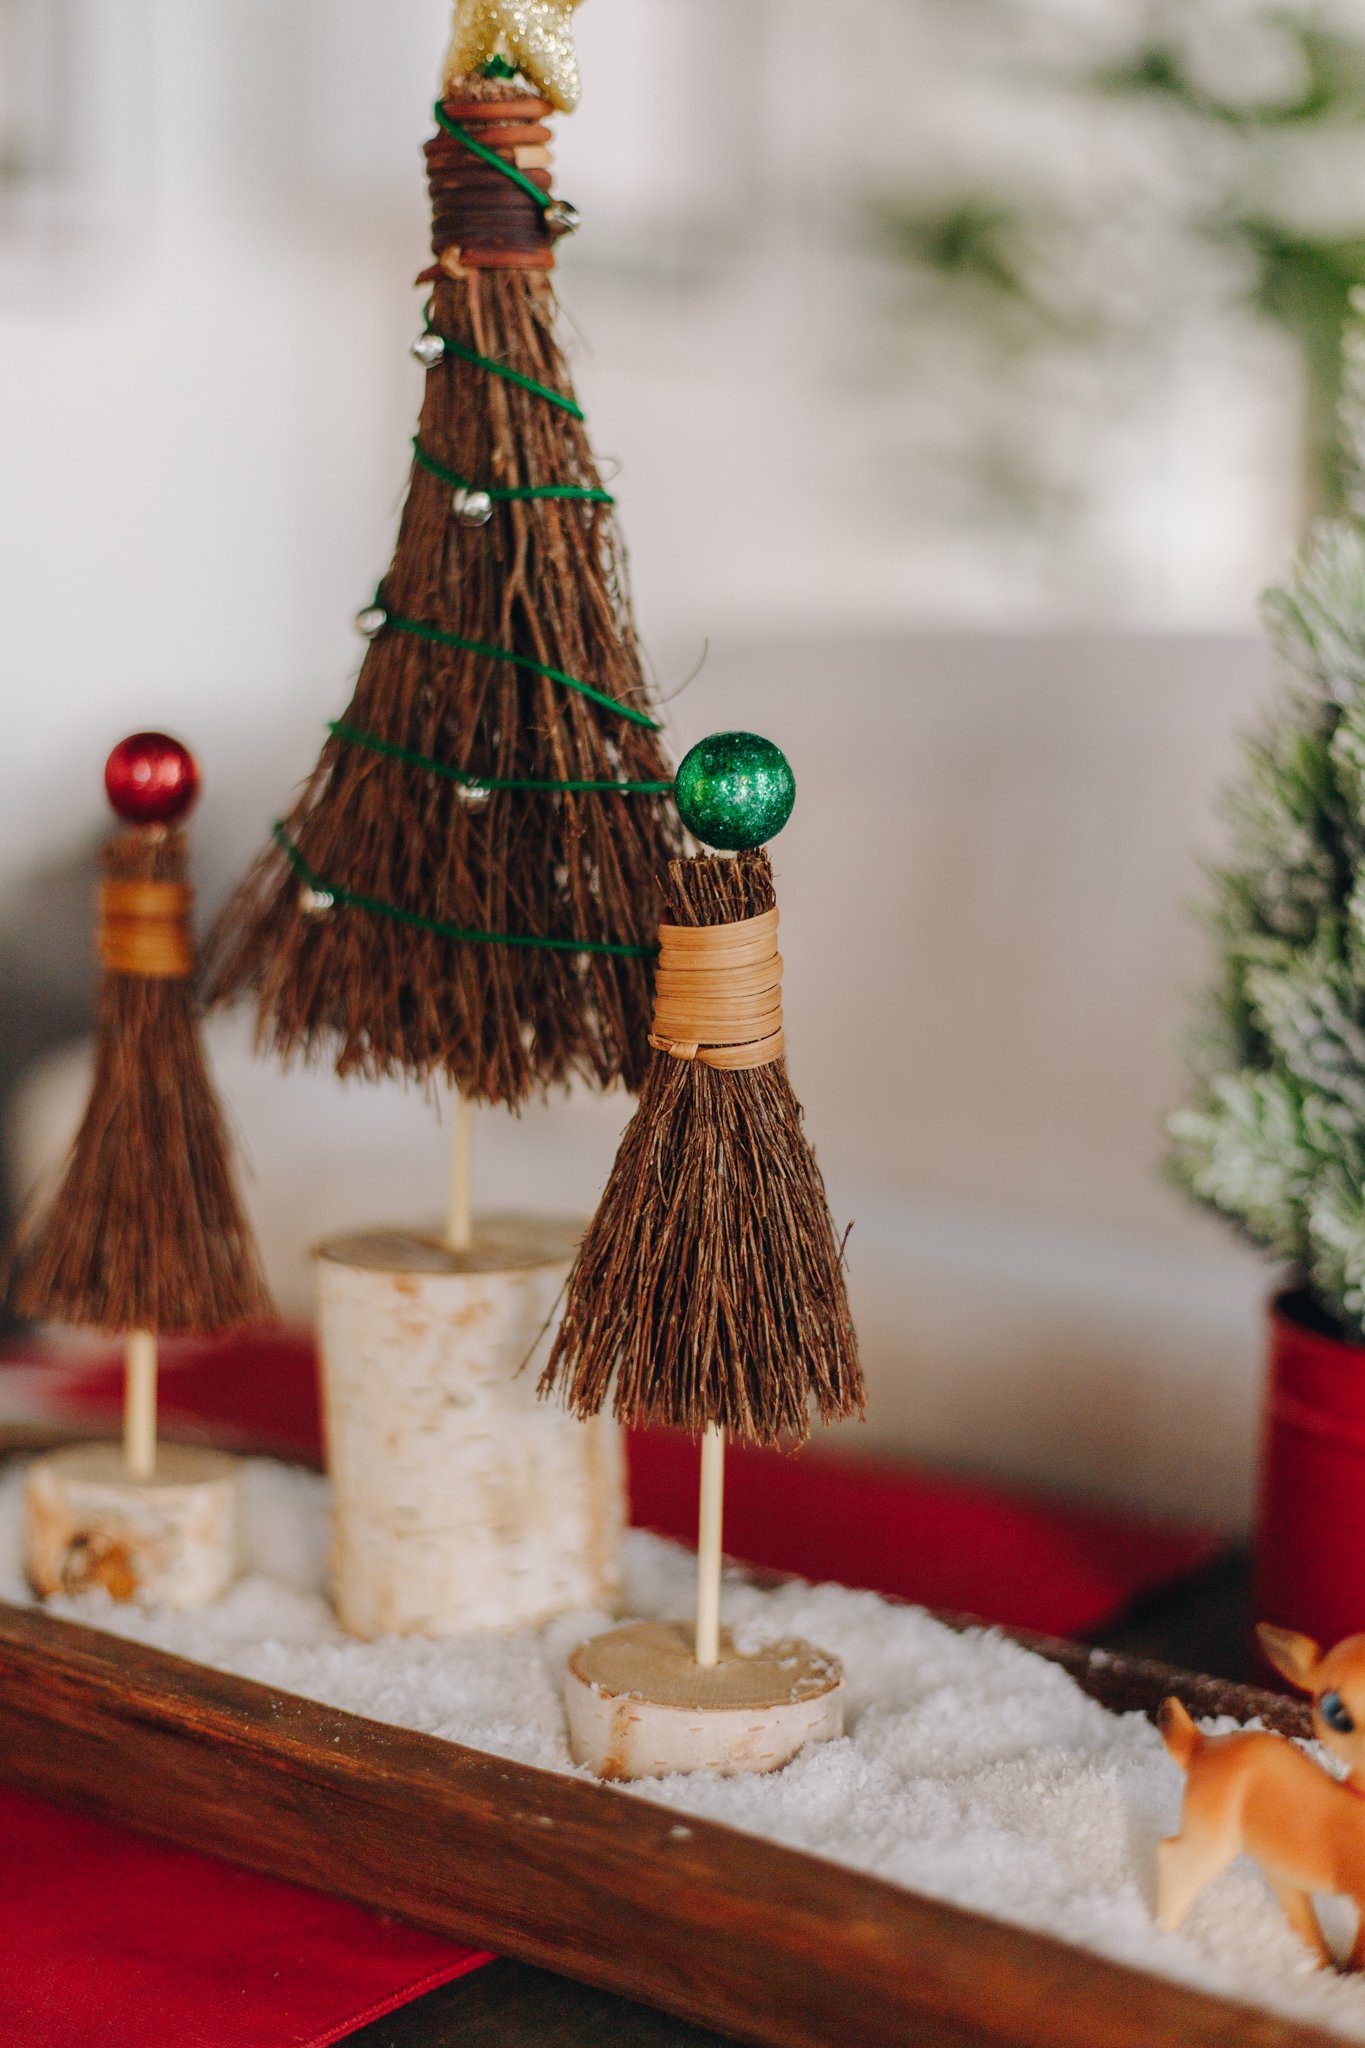
Now it's time to create the toppers for your trees. Using wire cutters, snip the bristles off the brooms, careful not to cut too close to the broom's base. These will be your treetop accents. Then, insert the pointy end of a skewer down through the top of the broom, leaving 1/2" out of the broom's base. Next, use wire cutters to trim the pointy end of the skewer to your desired height. You've now given your tree a stump! Cutting them at different lengths will give your forest a variety of tree sizes. Next, thread sparkly beads, mini bells, pearls, or whatever you'd like to decorate your tree with through embroidery floss, leaving 2-3 inches between each ornament. This will create a magical string lights effect on your tree. Tie one end of the string to the skewer at the broom's base and wrap the tree with your stringed ornaments by twisting the skewer until you reach the whisk of the broom. Secure the other end of the string by tying it to the skewer at the bottom of the tree. Finally, use the pointy edge of the skewer you cut off to poke a hole into your foam star tree topper. That will allow it to easily be placed on the 1/2" skewer you left at the broom's base. Once you don the star to the top of the tree, you are ready to assemble the trees!
Step Three: Assemble the Trees
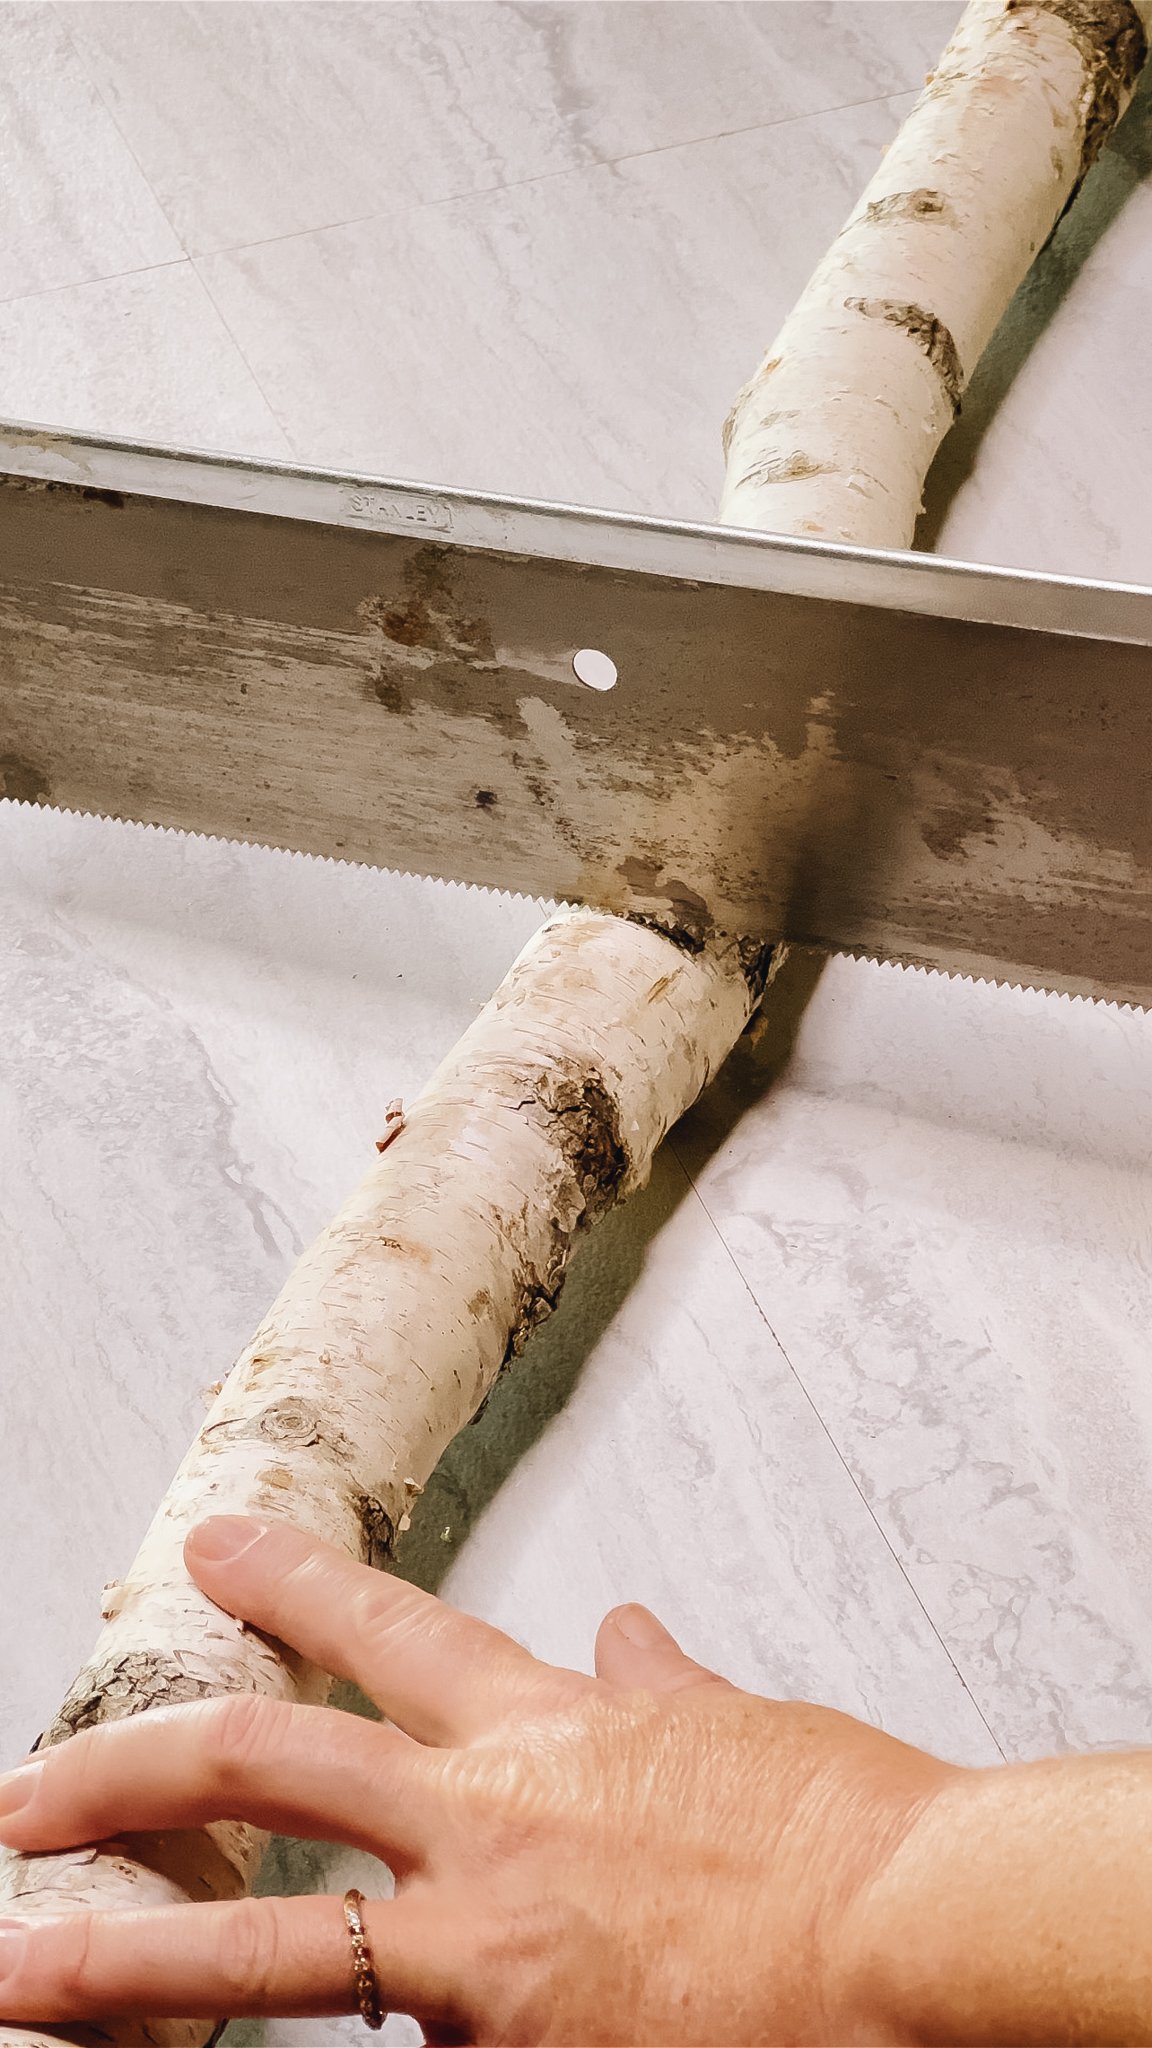
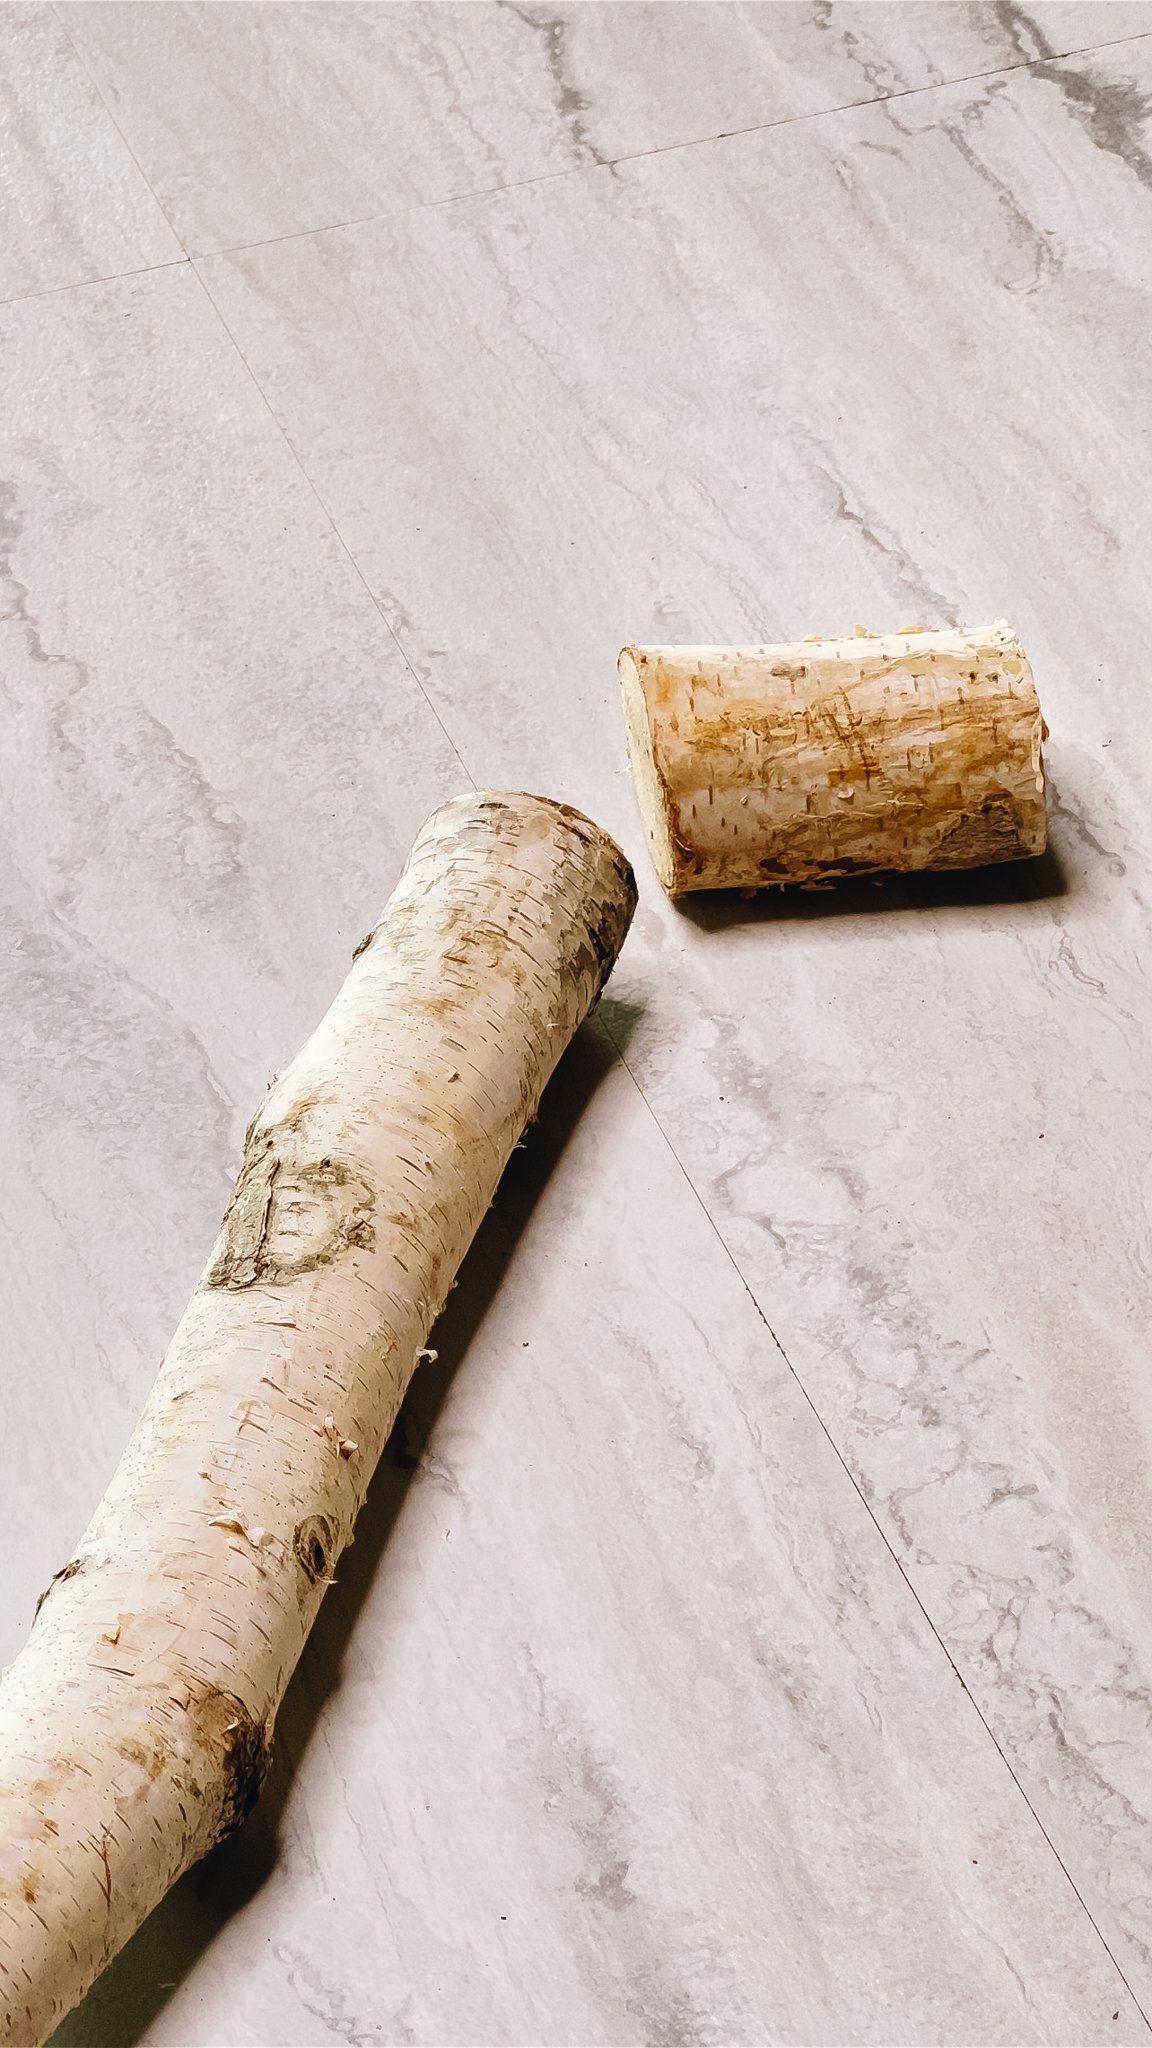
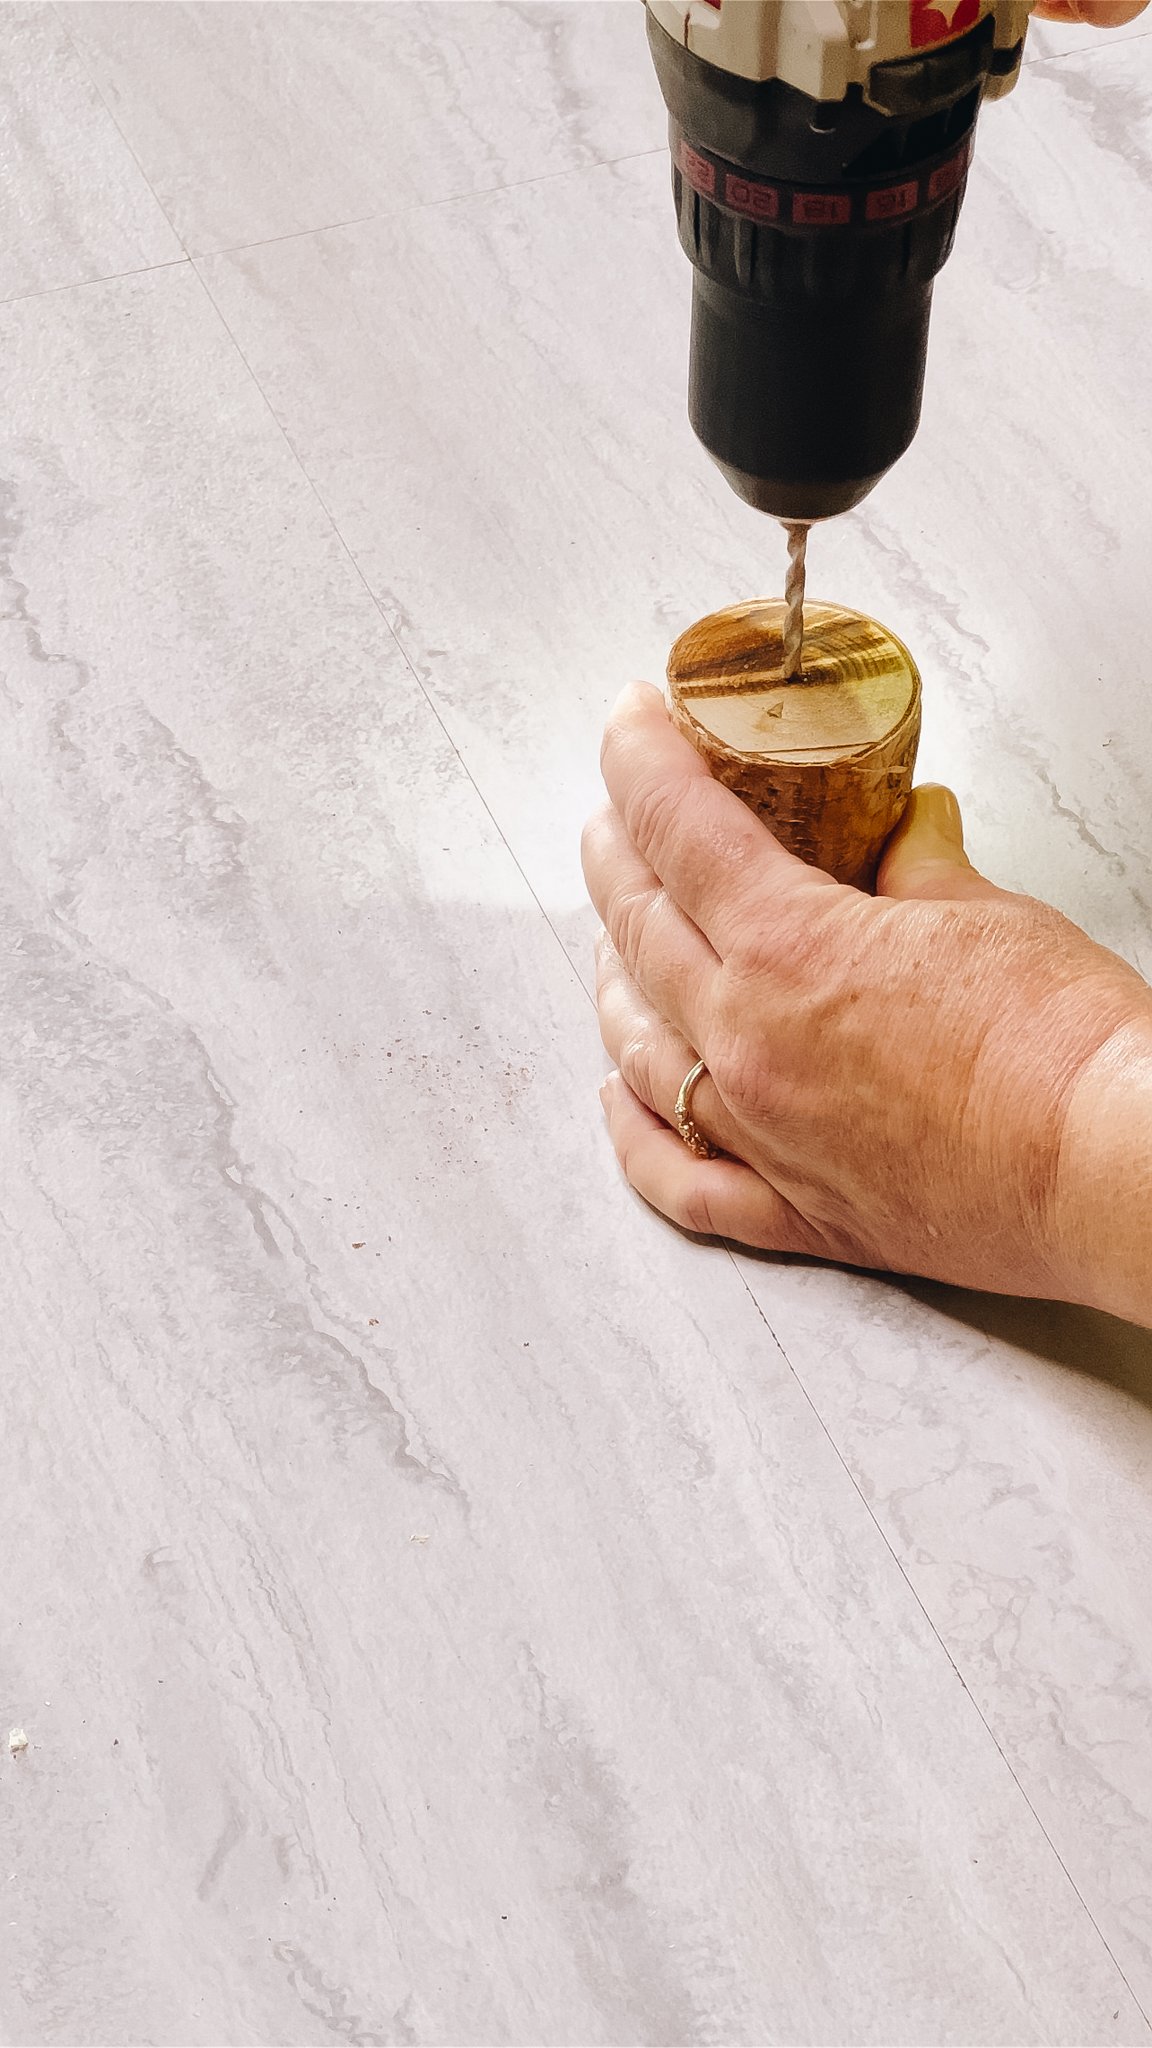
First, grab a birch log from your Birch Log Bundle from Bindle & Brass to put your trees together. Then, saw the log into varying lengths depending on the size of your brooms. For the 6" scented broom trees, we recommend cutting the log into 3-4" lengths to hold the larger tree. For the 3" scented broom trees, you can make them smaller. We cut ours to be 1-2" in length. Once your tree stands are cut, use a drill to make a hole in the center. This is where the skewer of your tree toppers will go into. For extra stability, you can also use hot glue around the bottom of the skewer as you place them in the hole.
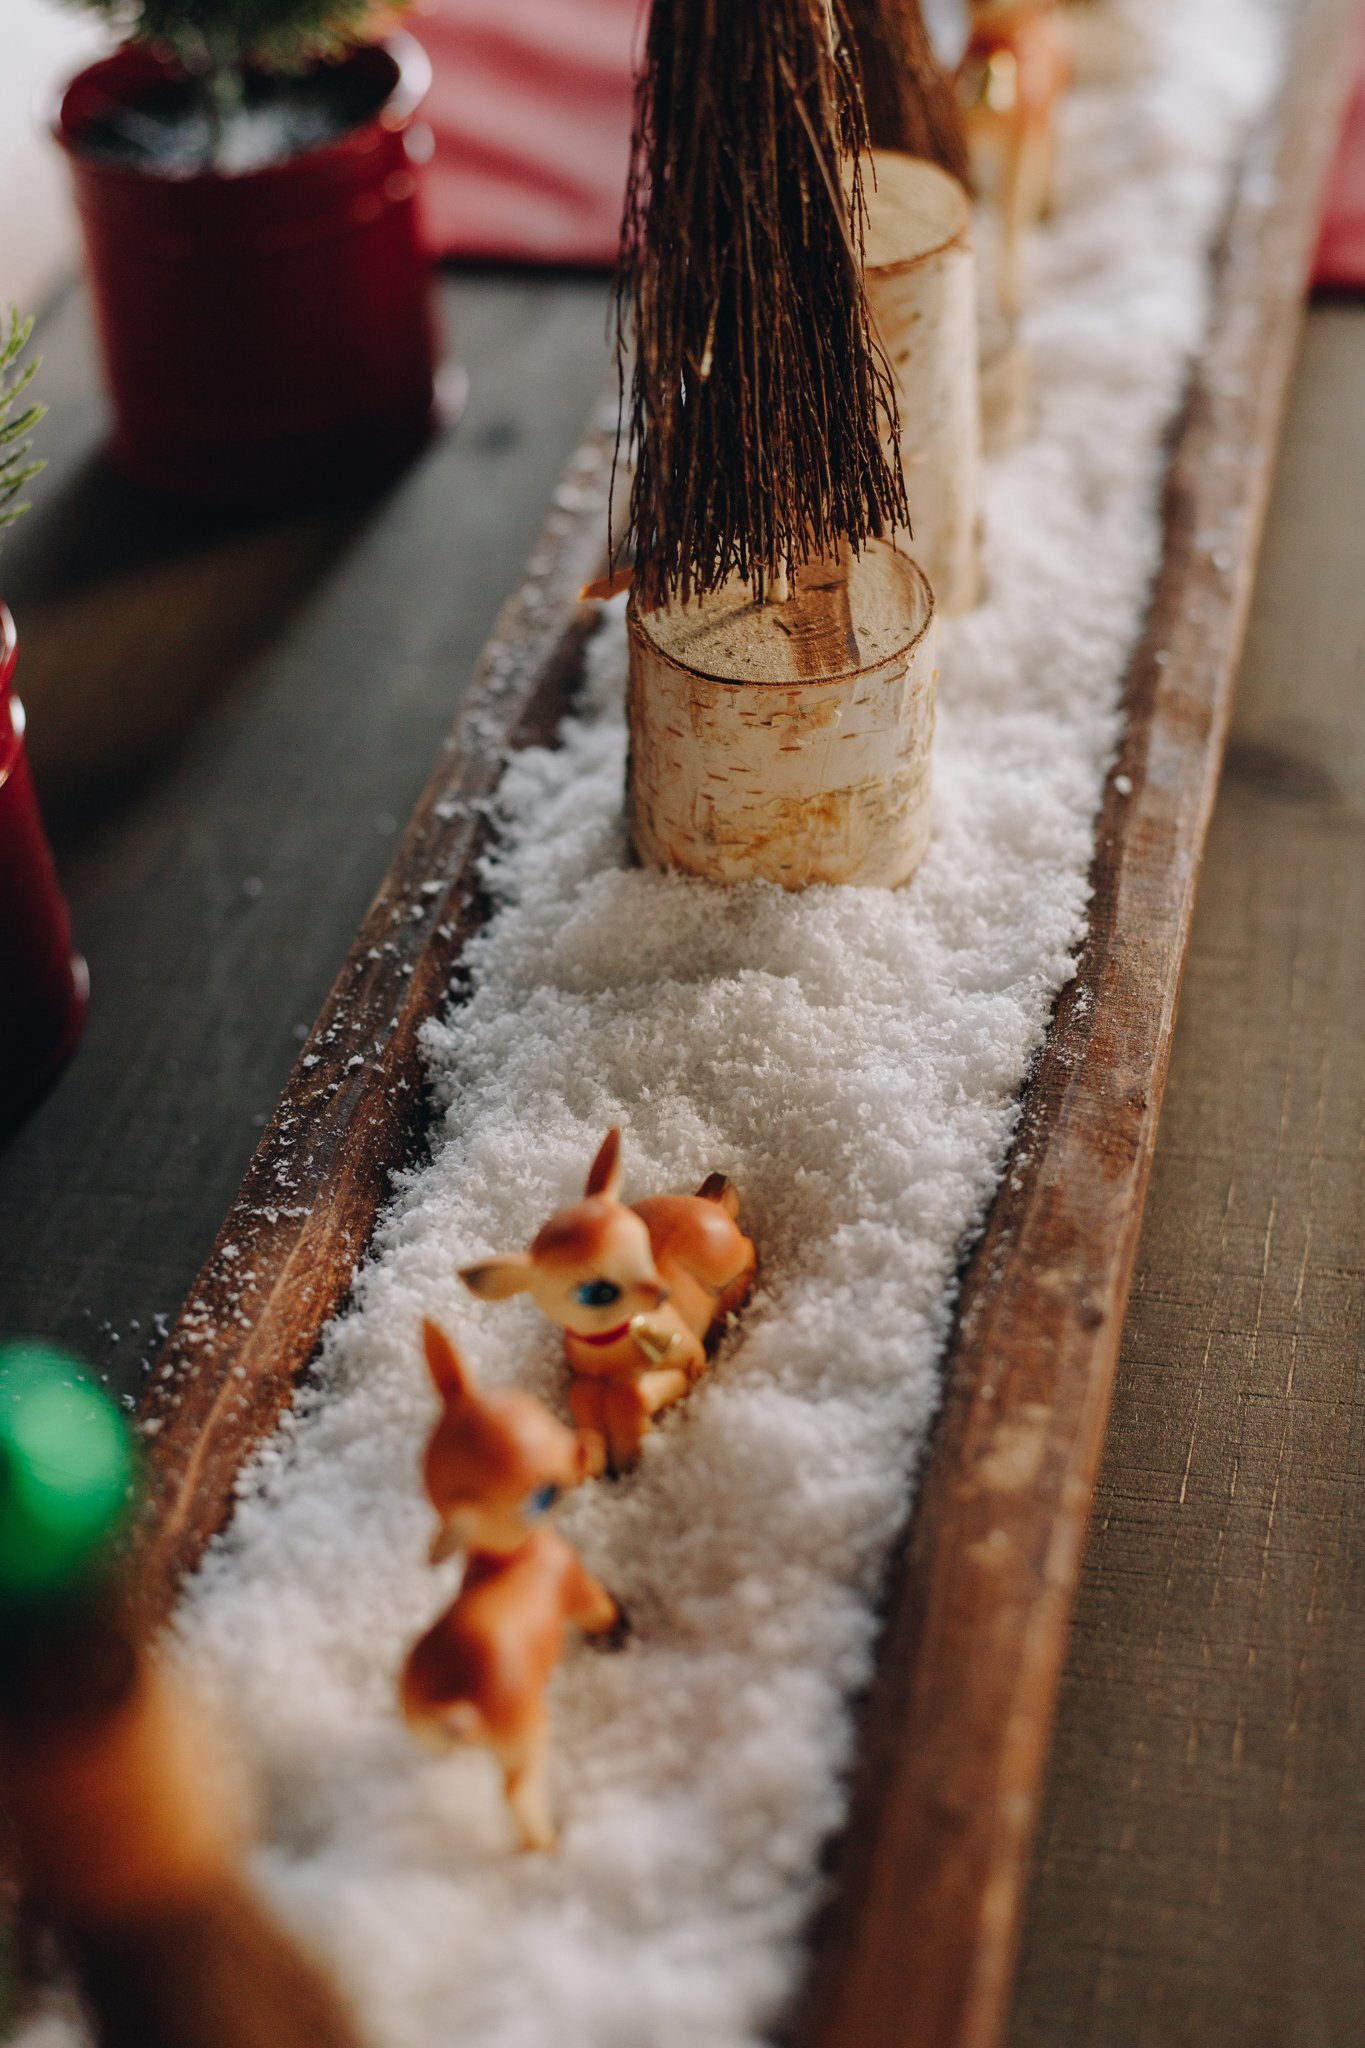

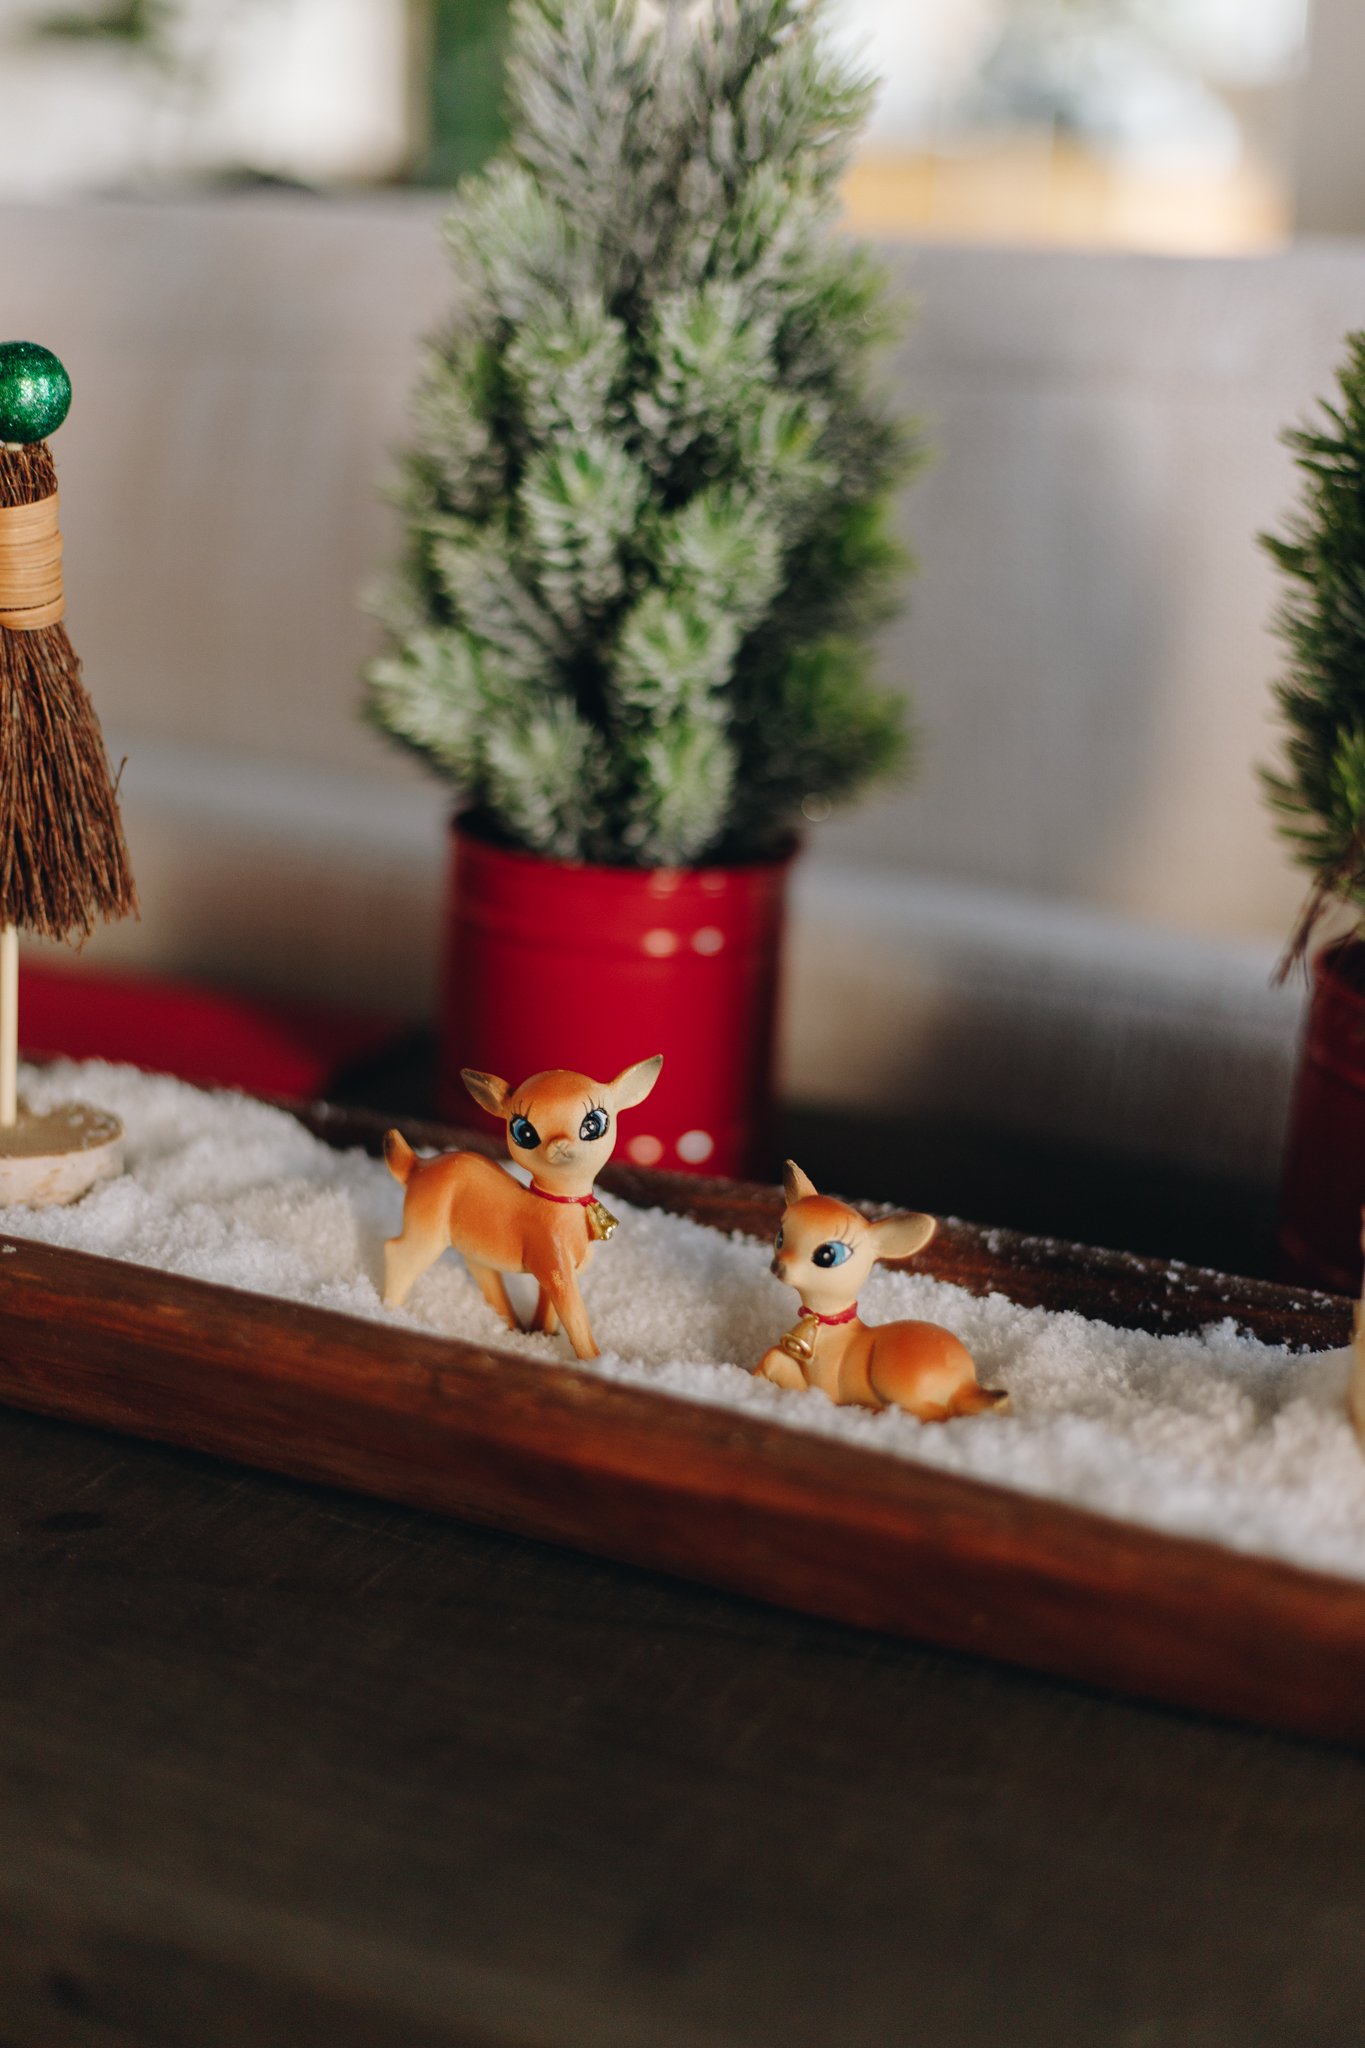

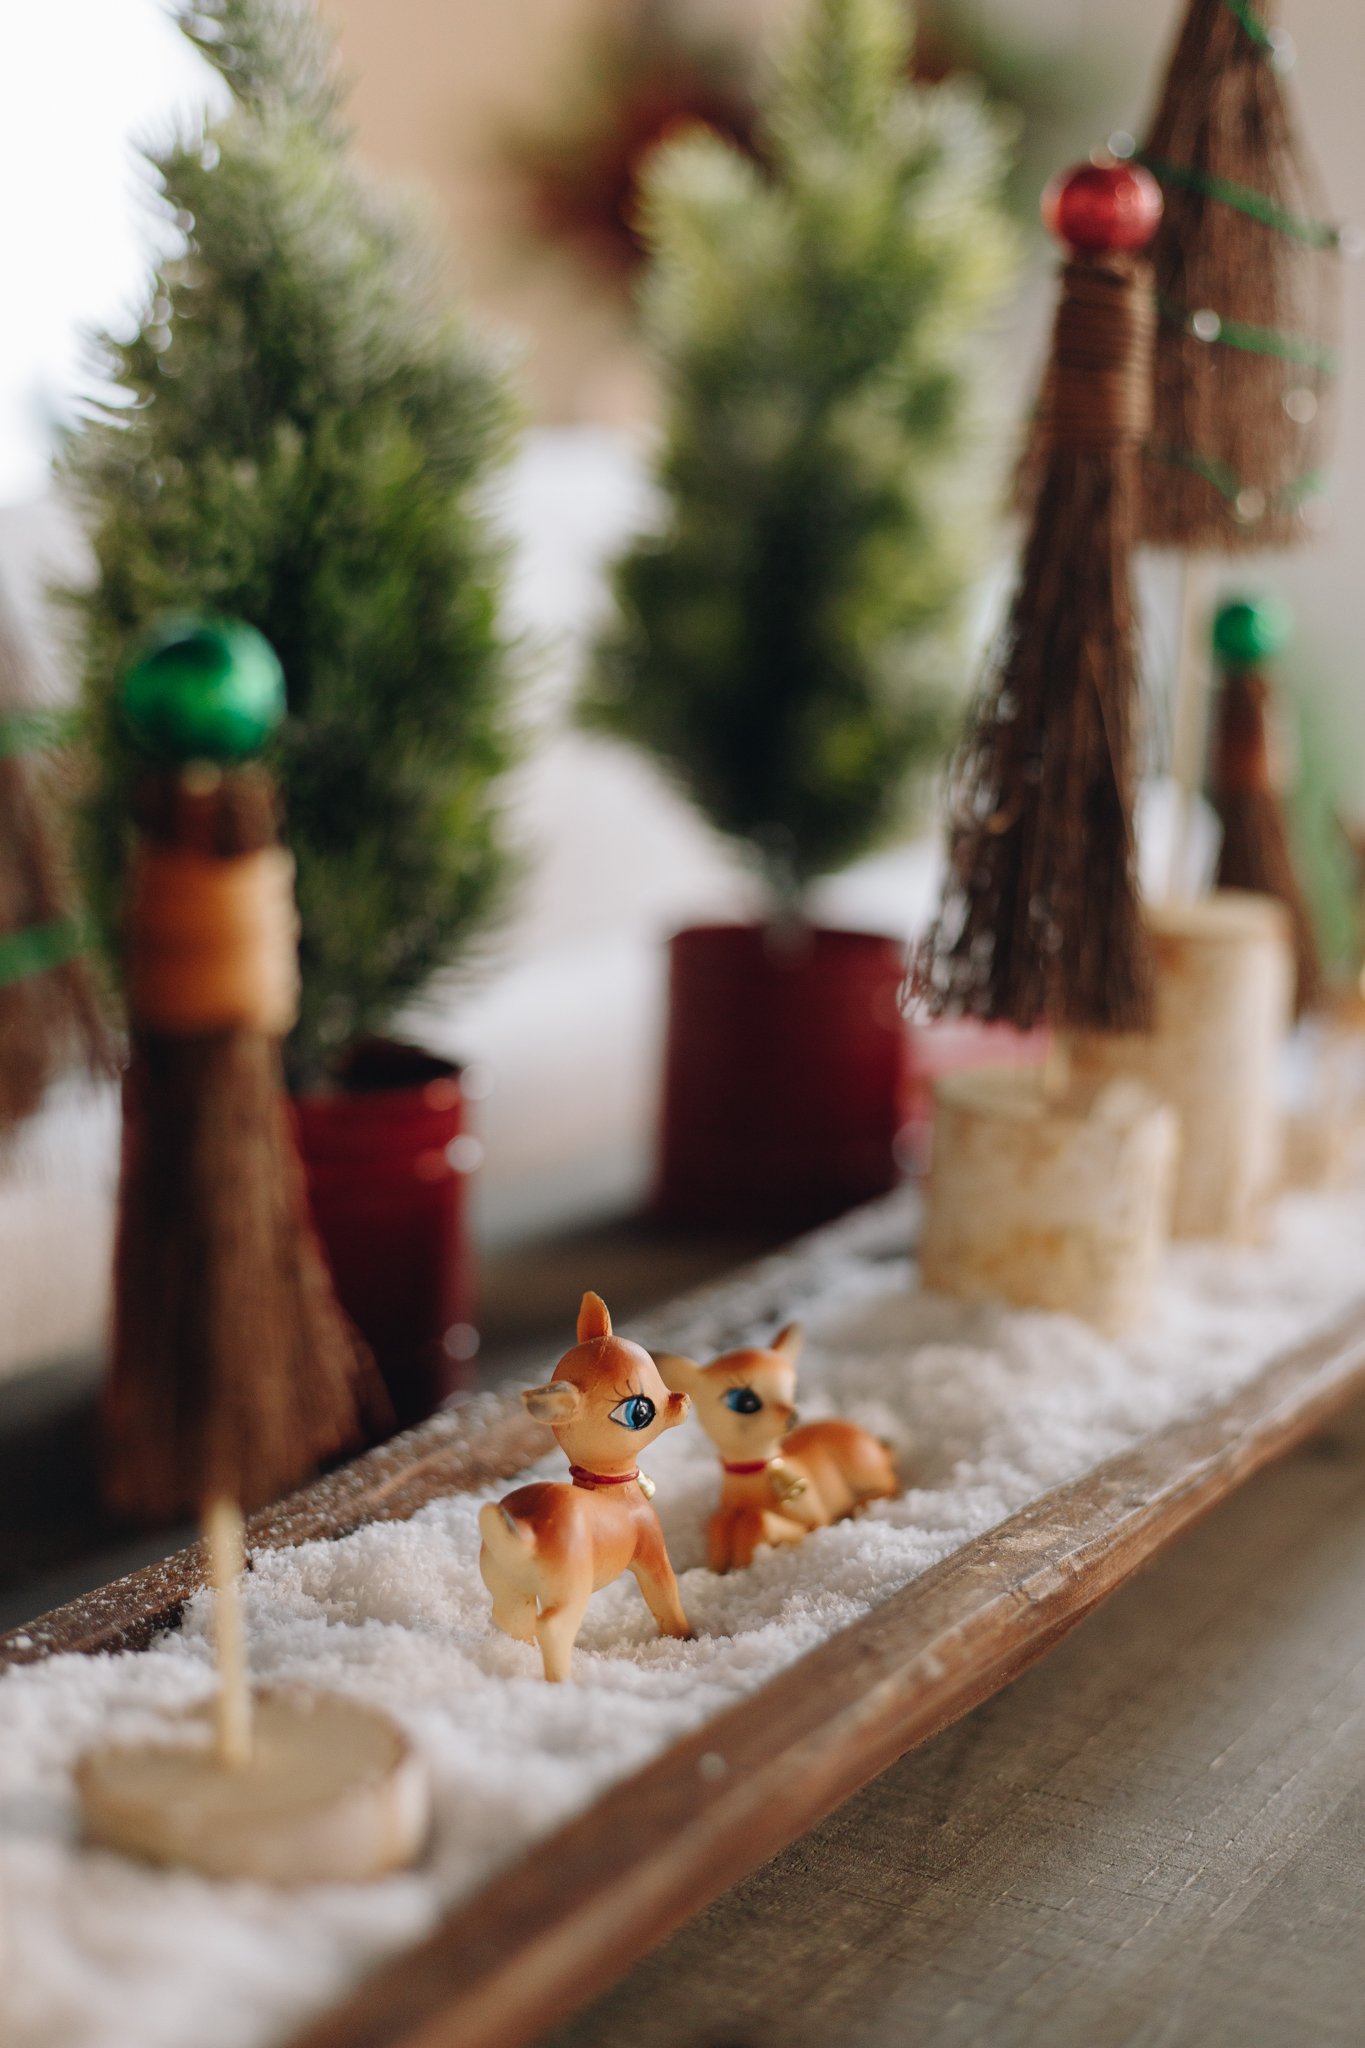
Step Four: Create Your Forest Scene
Now it's time to arrange your scene! Start by placing artificial snow on a table, shelf surface, or dough bowl. Then, set your trees however you like. Finally, add in any other fun holiday elements like miniature houses or woodland creatures for extra whimsy. And there you have it—a delightfully scented broom ornament forest that will add both beauty and holiday cheer to your home this season!


We hope you enjoyed this tutorial on how to make a scented broom forest. Incorporating this natural element will not only please the eye but fill the room with nature's enchanting scent. Be sure to tag us in any photos of your stunning holiday displays—we can't wait to see what you create! #MerryChristmas